This article will show you how to create a mail account in https://portal.awesomehosting.com, the new MSPControl Panel for AwesomeCloud shared hosting accounts.
For details on how to log-in to the control panel, visit https://support.appliedi.net/kb/a1348/how-to-login-to-portal_awesomehosting_com.aspx
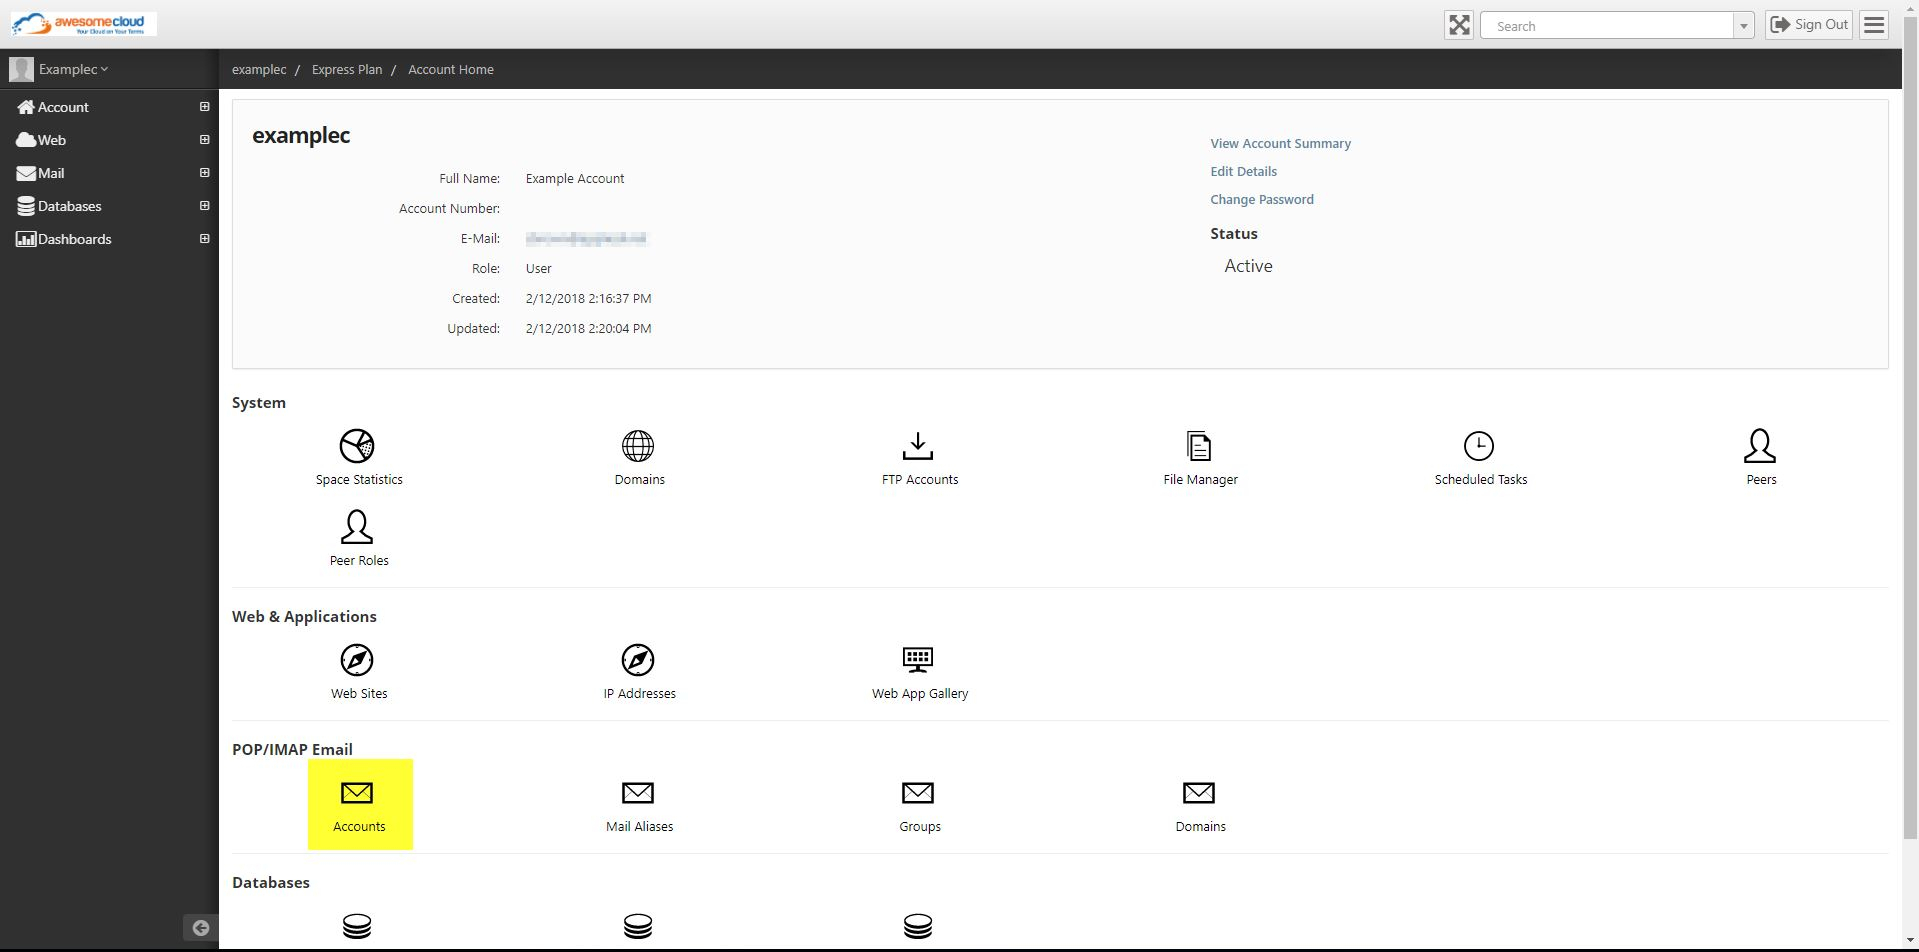
Step 1. Once logged-in to MSPControl Panel, you’ll see the main page below. This is your hosting space. Click Accounts to create an e-mail account.

Click on the screenshot below to enlarge it.
Step 2. Click + Add.
Click on the screenshot below to enlarge it.

The screenshot above is for Step 2.
The screenshot below is for Steps 3 to 15.
Click on the screenshot below to enlarge it.
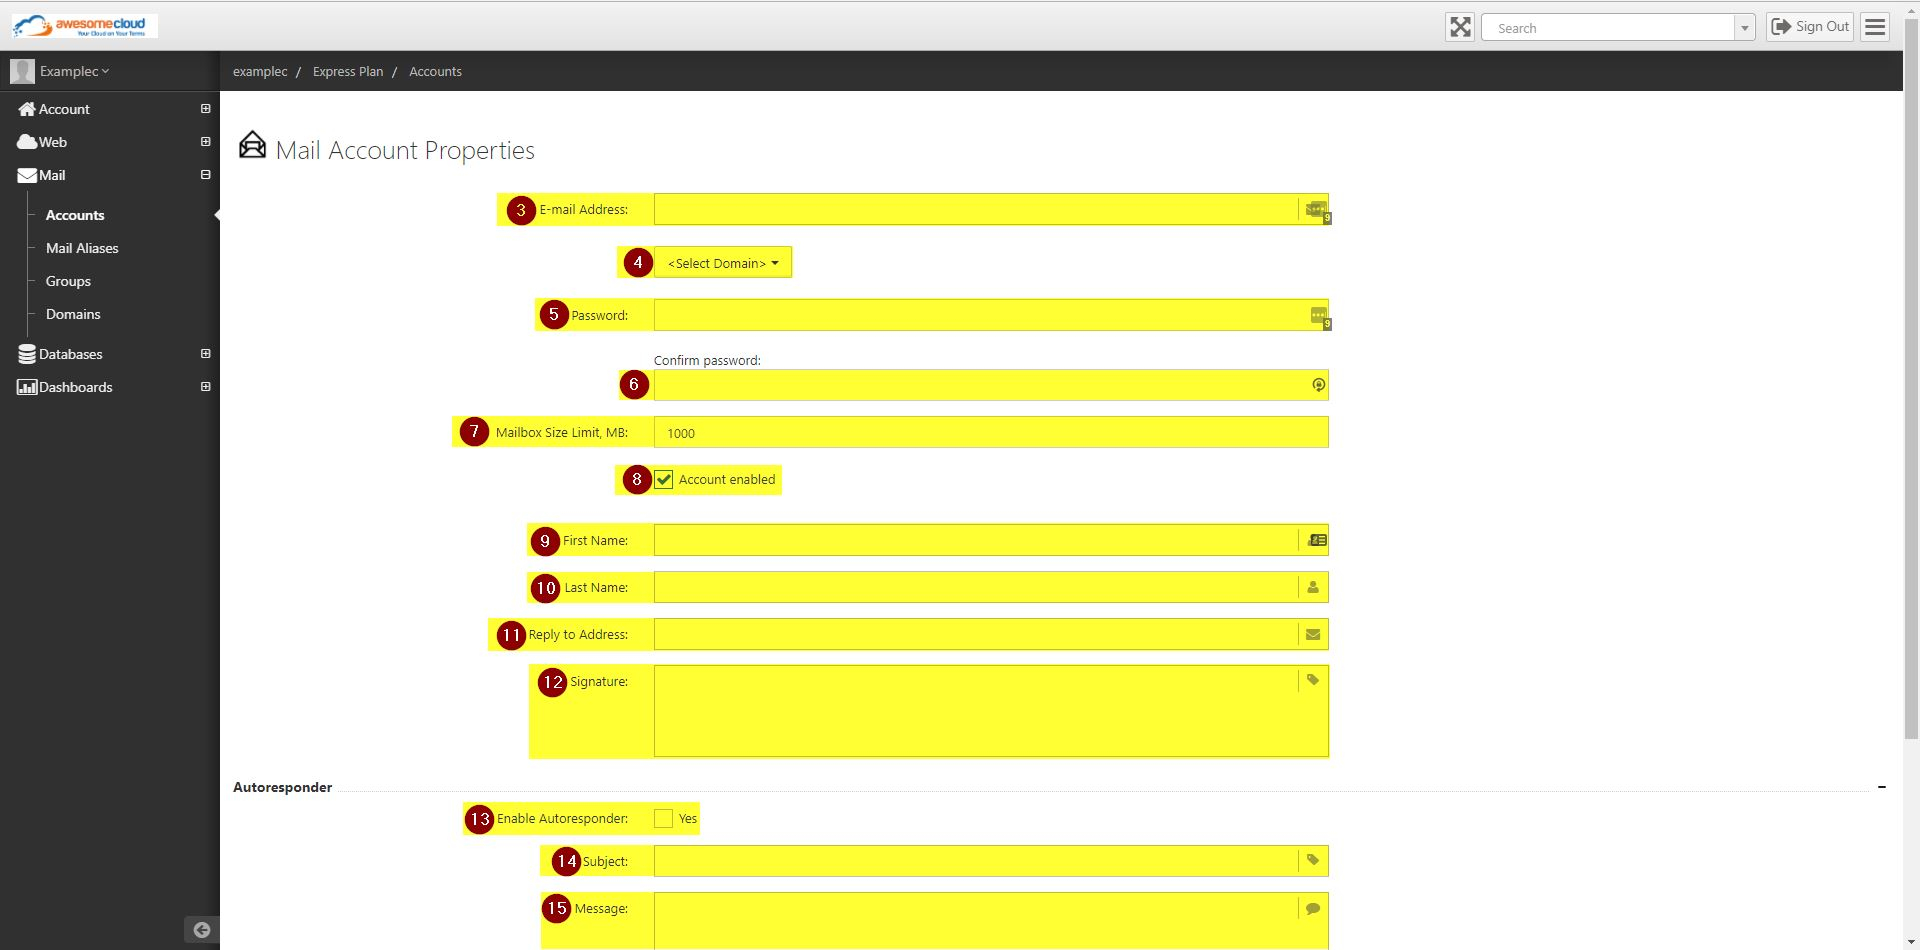
Step 3. Create the e-mail address you want. Enter only the part before the @ sign. For example, if the e-mail address you want to create is johndoe@example.com, enter johndoe in the E-mail Address field.
Step 4. Select the domain for the e-mail account. This is the part after the @ sign. For example, if the e-mail address you want to create is johndoe@example.com, select example.com as the Domain from the drop-down menu.
Step 5. Set a password for logging-in to the e-mail account.
For security, the password must:
- be at least 8 alphanumeric characters,
- be no more than 20 alphanumeric characters,
- contain at least 1 number.
Step 6. Confirm the password by re-entering it.
Step 7. Set a mailbox size limit for this e-mail address (in megabytes, MB). The default value is 1000 MB.
Step 8. Enable the mail account by checking this box.
Step 9. Enter the first name that will appear when messages are sent from this e-mail address. For example: John or Sales
Step 10. Enter the last name that will appear when messages are sent from this e-mail address. For example: Doe or Department
(In the examples in Steps 8 and 9 above, the sender’s name will appear as John Doe or Sales Department.)
Optional Step 11. Enter the "Reply To" Address. The reply to address is where e-mails will be delivered to you when your recipients reply to e-mails you send. In most cases, the recipient will simply reply to your e-mail address. If you want them to reply to your e-mail address, you can simply leave this field blank.
But in some cases you may want all replies to go to a different e-mail address. For example, say you want JaneDoe@example.com to receive all the replies. You would enter JaneDoe@example.com as shown in Step 10 below in the screenshot.
Optional Step 12. You can create a signature for this e-mail account if you wish. E-mail signatures will be automatically appended to the bottom of every e-mail message you send. E-mail signatures commonly include your name and contact information. For example,
John Doe
Executive Vice President
Acme Corporation
johndoe@example.com
Phone: (123) 456-7890
Fax: (987) 654-3210
12345 Main Street
Anytown, FL 34567
Facebook
Twitter
Instagram
SnapChat
Optional Step 13. If you are going on vacation, travelling out-of-town, or will be out of the office / out-of-pocket, you can set an autoresponder by checking the box as shown in Step 12.
Optional Step 14. If you enabled autoresponder in Step 12 above, enter the subject line you want shown to your recipients in your automatic replies to their message.
Optional Step 15. If you enabled autoresponder in Step 13 above, enter a message for the automatic reply.
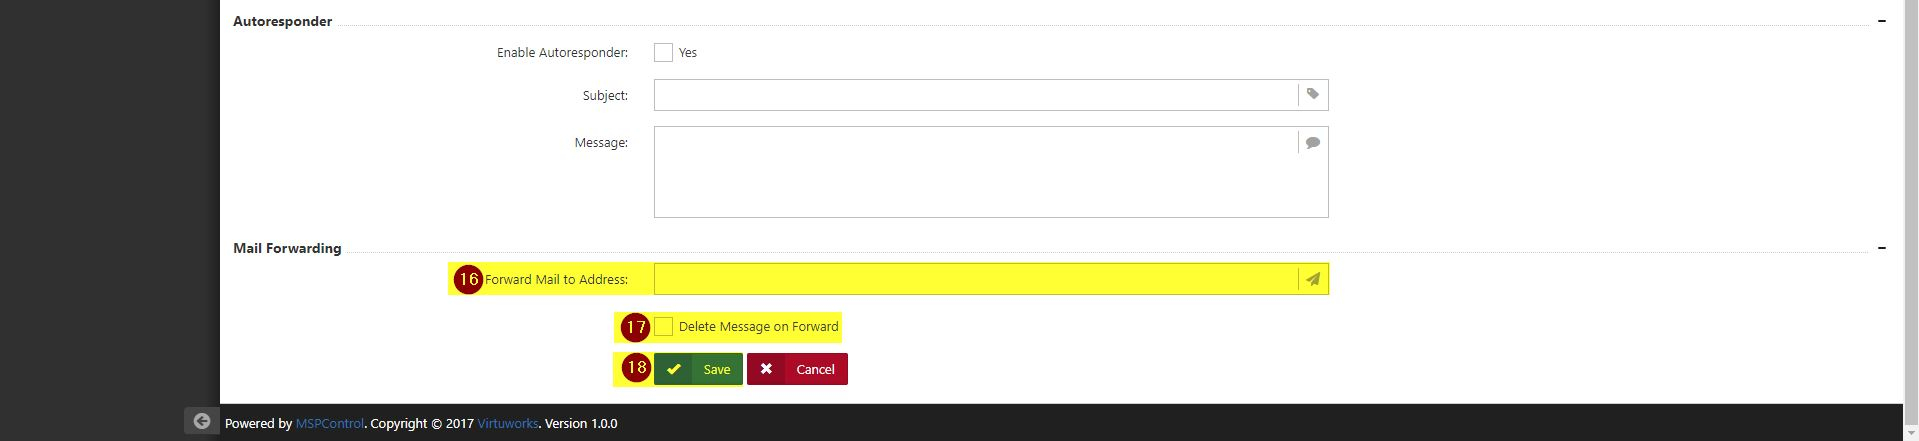
Optional Step 16. If you want to enable mail forwarding, enter the Forward Mail to Address. Note that this will forward all messages that are sent to this e-mail address to another e-mail address.
Optional Step 17. Leave this box unchecked if you want this e-mail account to both forward messages to another account and keep the original message in the mailbox of this e-mail address. (In other words, the same messages will be in both mailboxes — the one it was originally sent to, and the one it’s being forwarded to).
Check this box if you want to Delete Message on Forward. Once the message is forwarded to this other e-mail address, it will be deleted from the forwarder’s mailbox.
Step 18. Click Save.
The screenshot below is for Steps 16 to 18.
Click on the screenshot below to enlarge it.
Step 19. You will see the newly-created e-mail address in the list of mail accounts.
Click on the screenshot below to enlarge it.

Step 20. Congratulations! You’re all set. To create another e-mail account, repeat Steps 2 to 19 above.
If you encounter any errors or difficulties along the way, feel free to contact Support at https://support.appliedi.net
Content retrieved from: https://support.appliedi.net/kb/a1354/how-to-create-a-mail-account.aspx.