This article will show you how to change the version of PHP for a website in https://portal.awesomehosting.com, the new MSPControl Panel for AwesomeCloud shared hosting accounts.
For details on how to log-in to the control panel, visit https://support.appliedi.net/kb/a1348/how-to-login-to-portal_awesomehosting_com.aspx
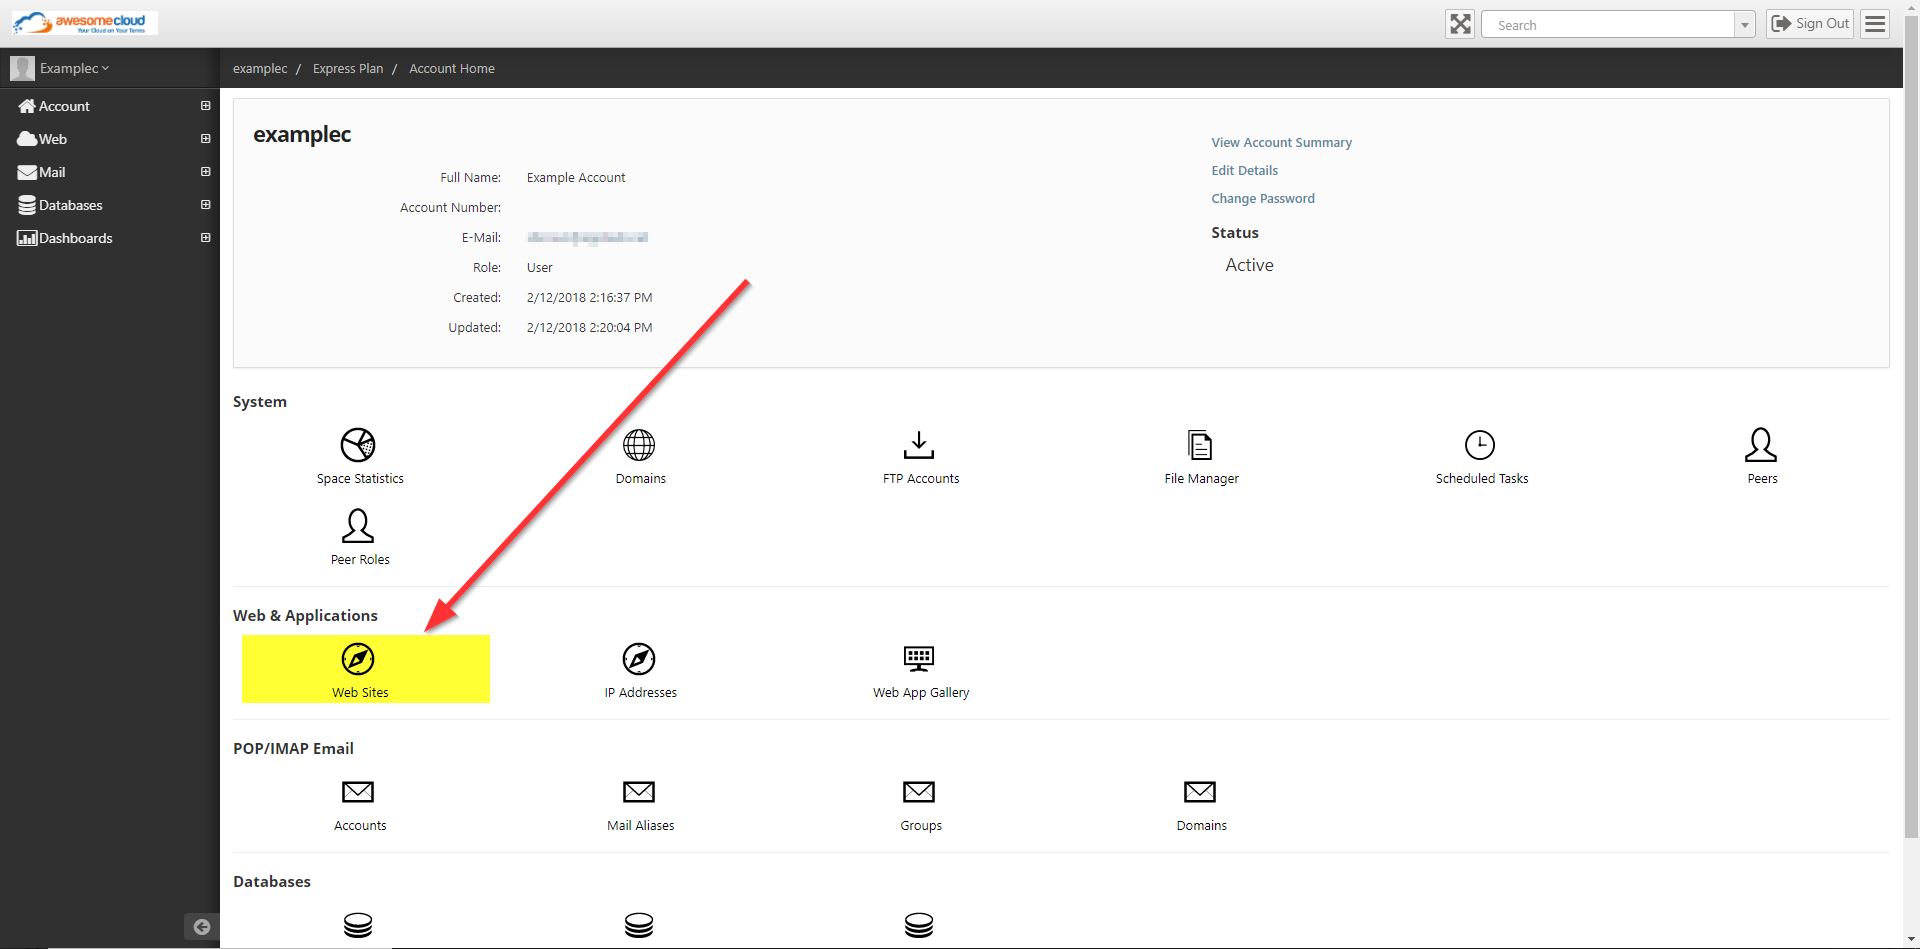
Step 1. Once logged-in to MSPControl Panel, you’ll see the main page below. This is your hosting space. Click Web Sites.
Click on the screenshot below to enlarge it.
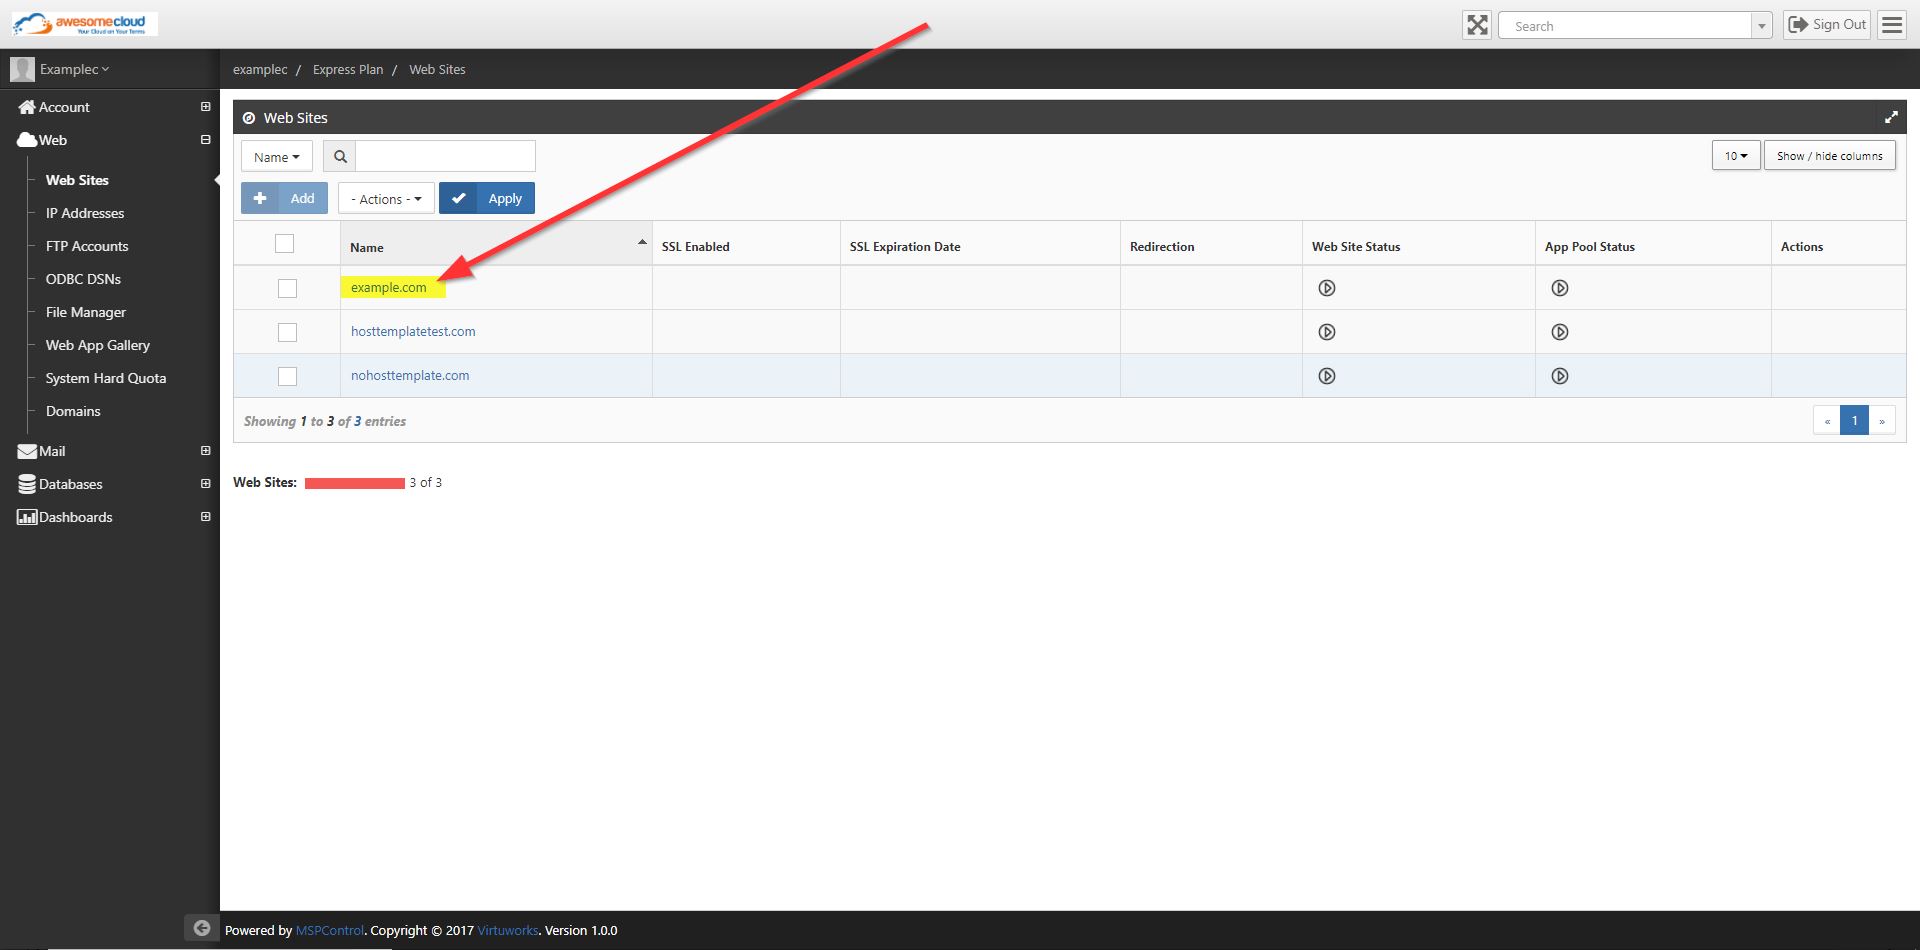
Step 2. Click the name of the website where you want to change the PHP edition. In the screenshot below, we’re using example.com as an example.
Click on the screenshot below to enlarge it.
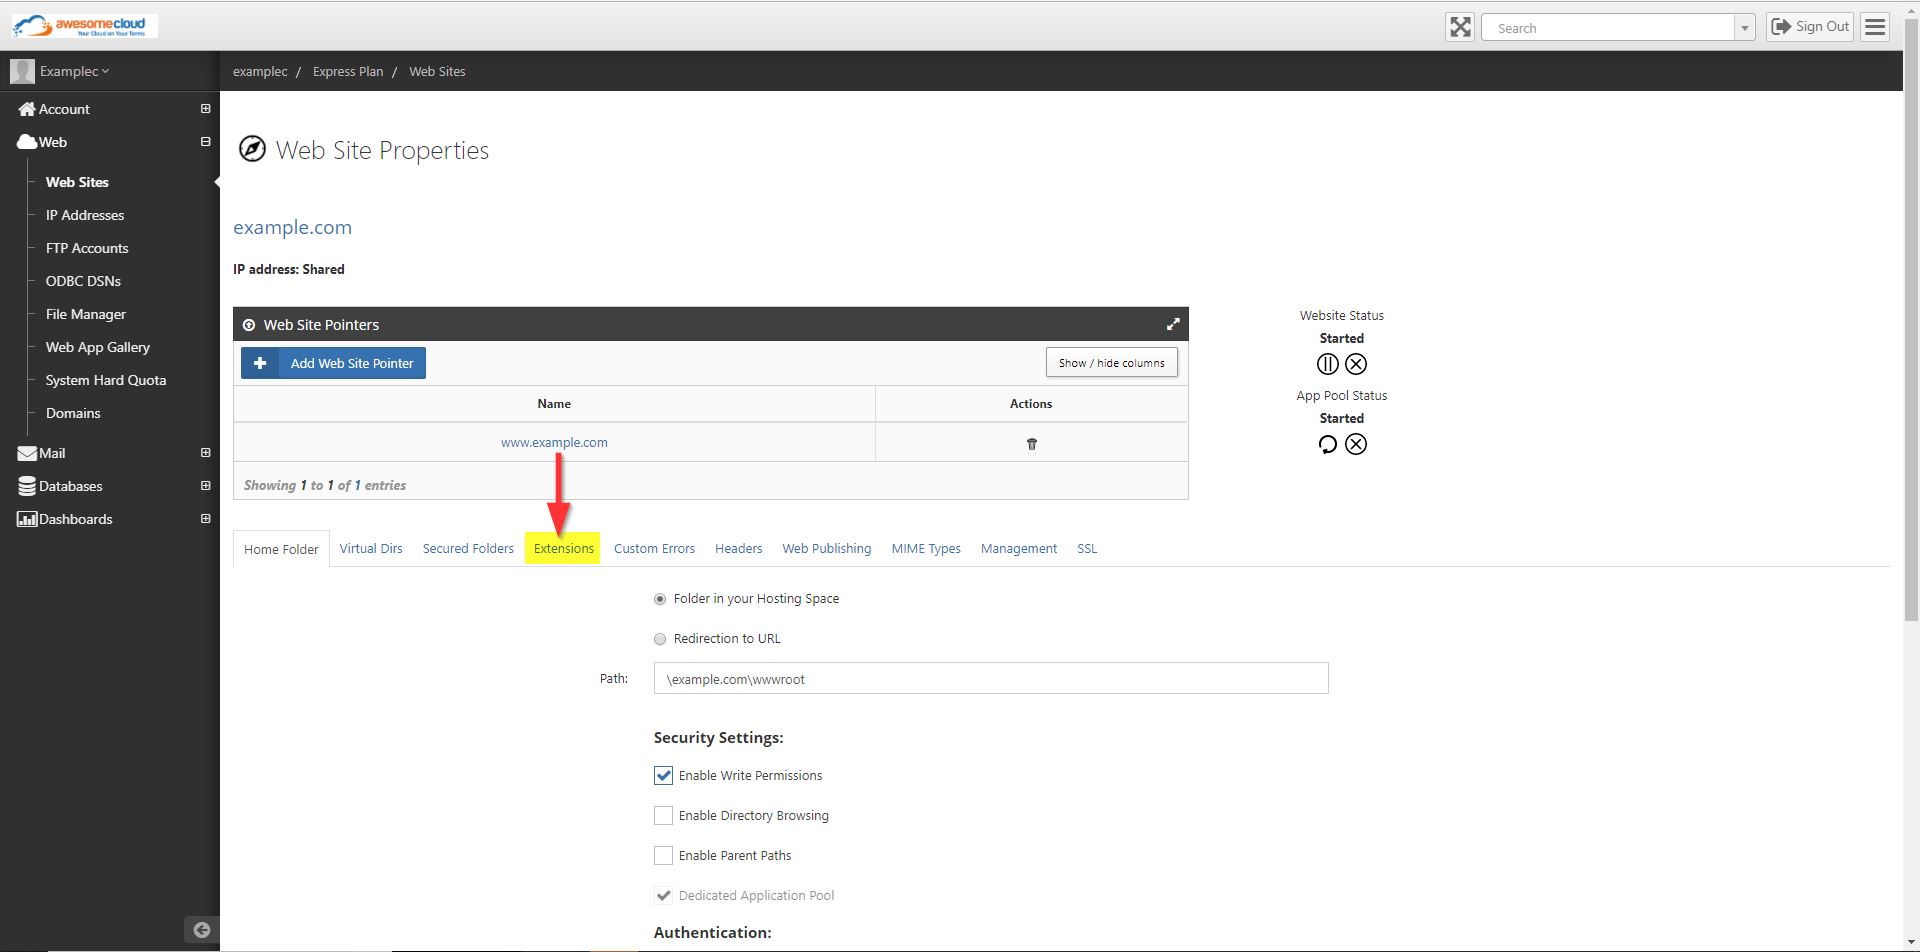
Step 3. Click the Extensions tab.
Click on the screenshot below to enlarge it.
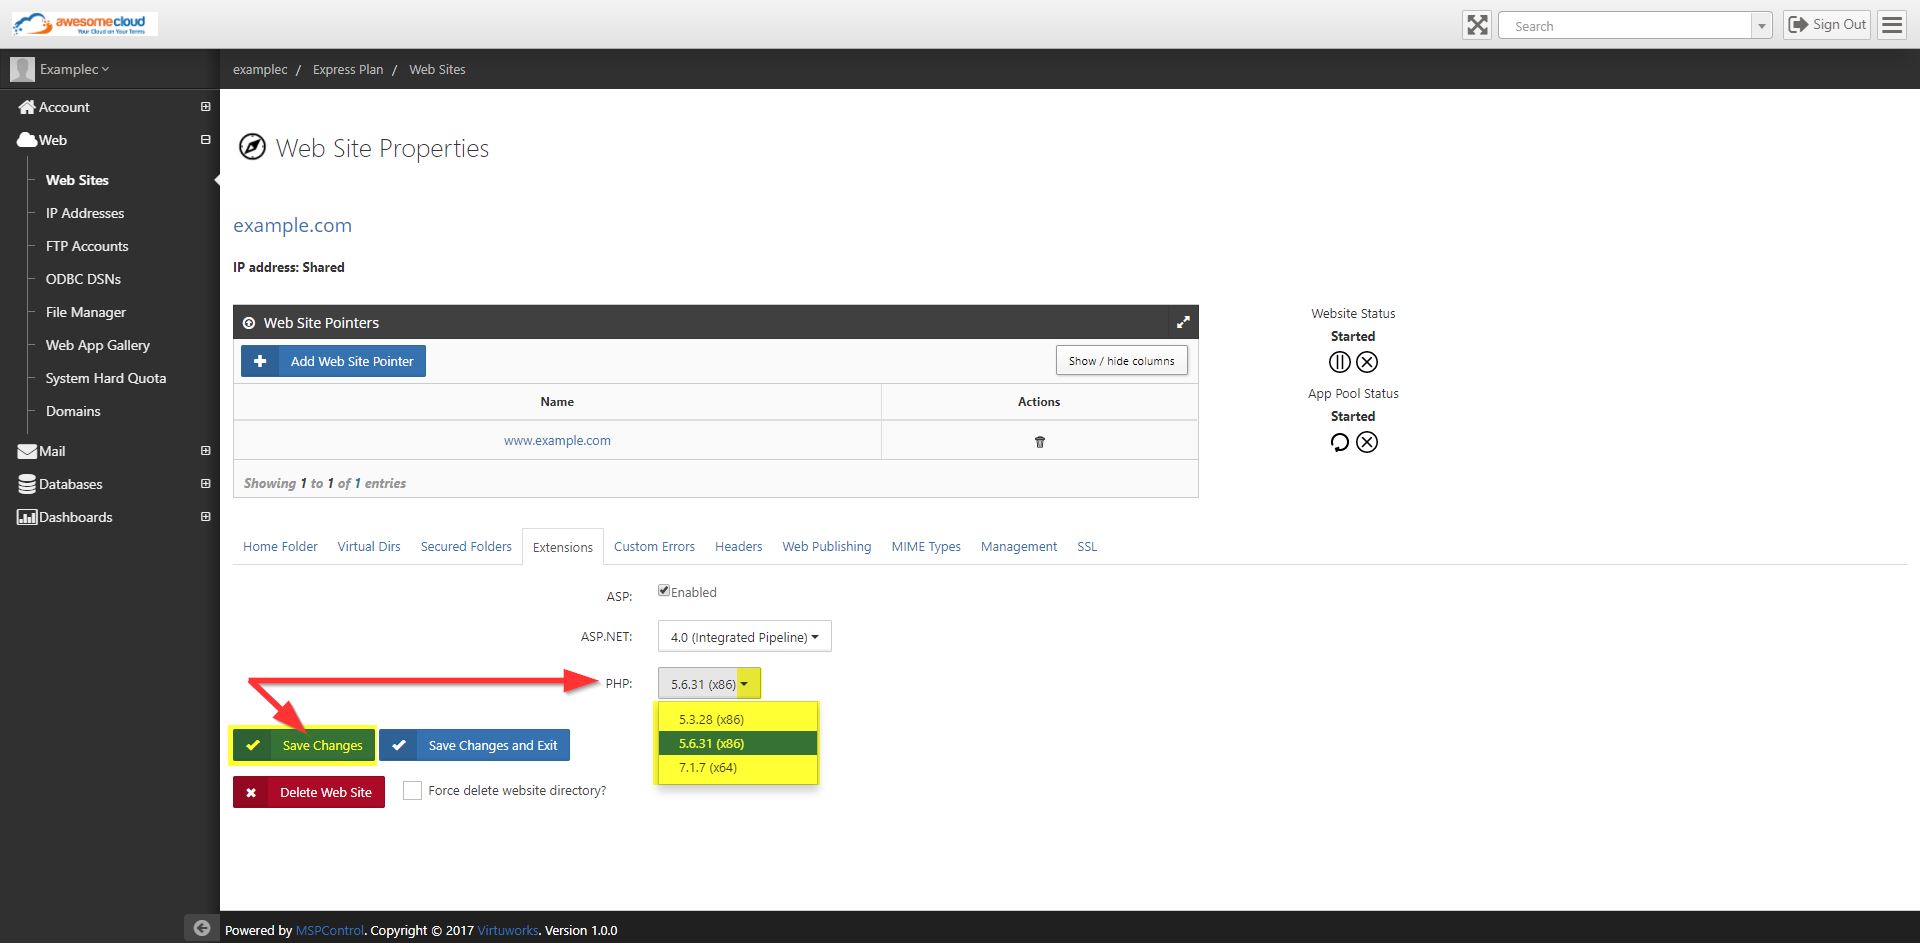
Step 4. Click the drop-down menu and select the version of PHP you want. Then click Save Changes.
Click on the screenshot below to enlarge it.
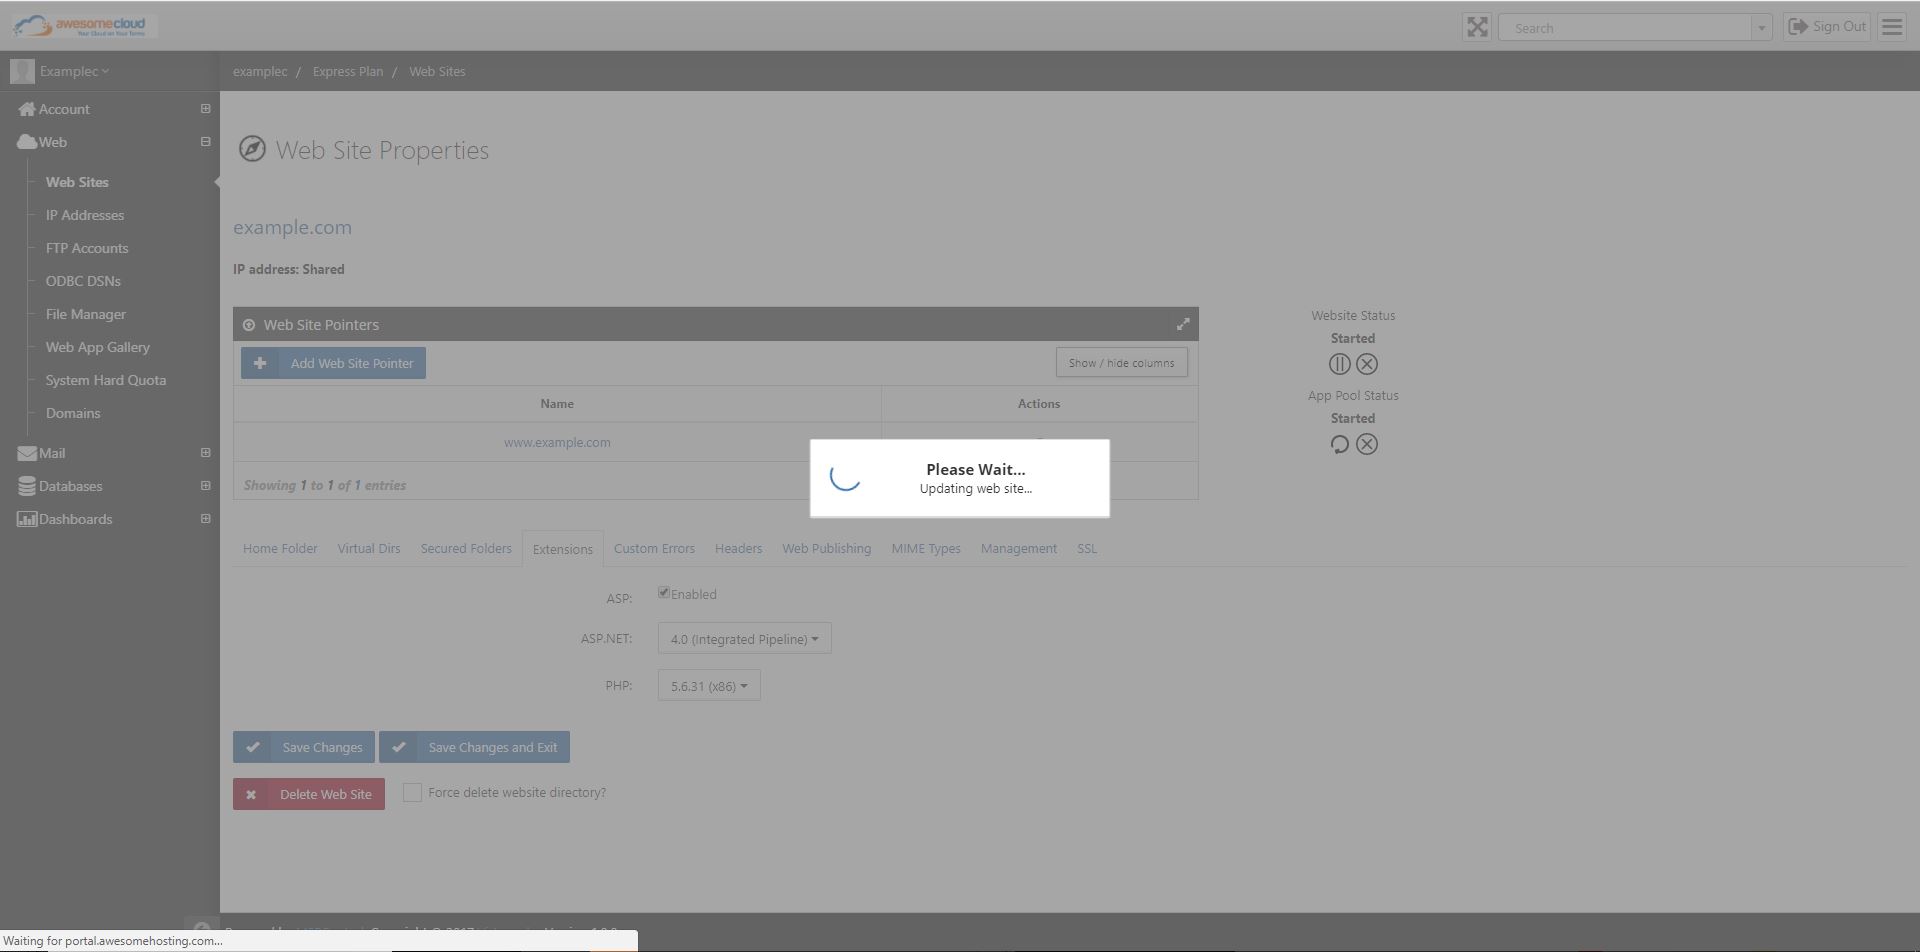
Step 5. You will see the following status as your PHP changes are being saved. This can take 30-60 seconds and is normal.
Click on the screenshot below to enlarge it.
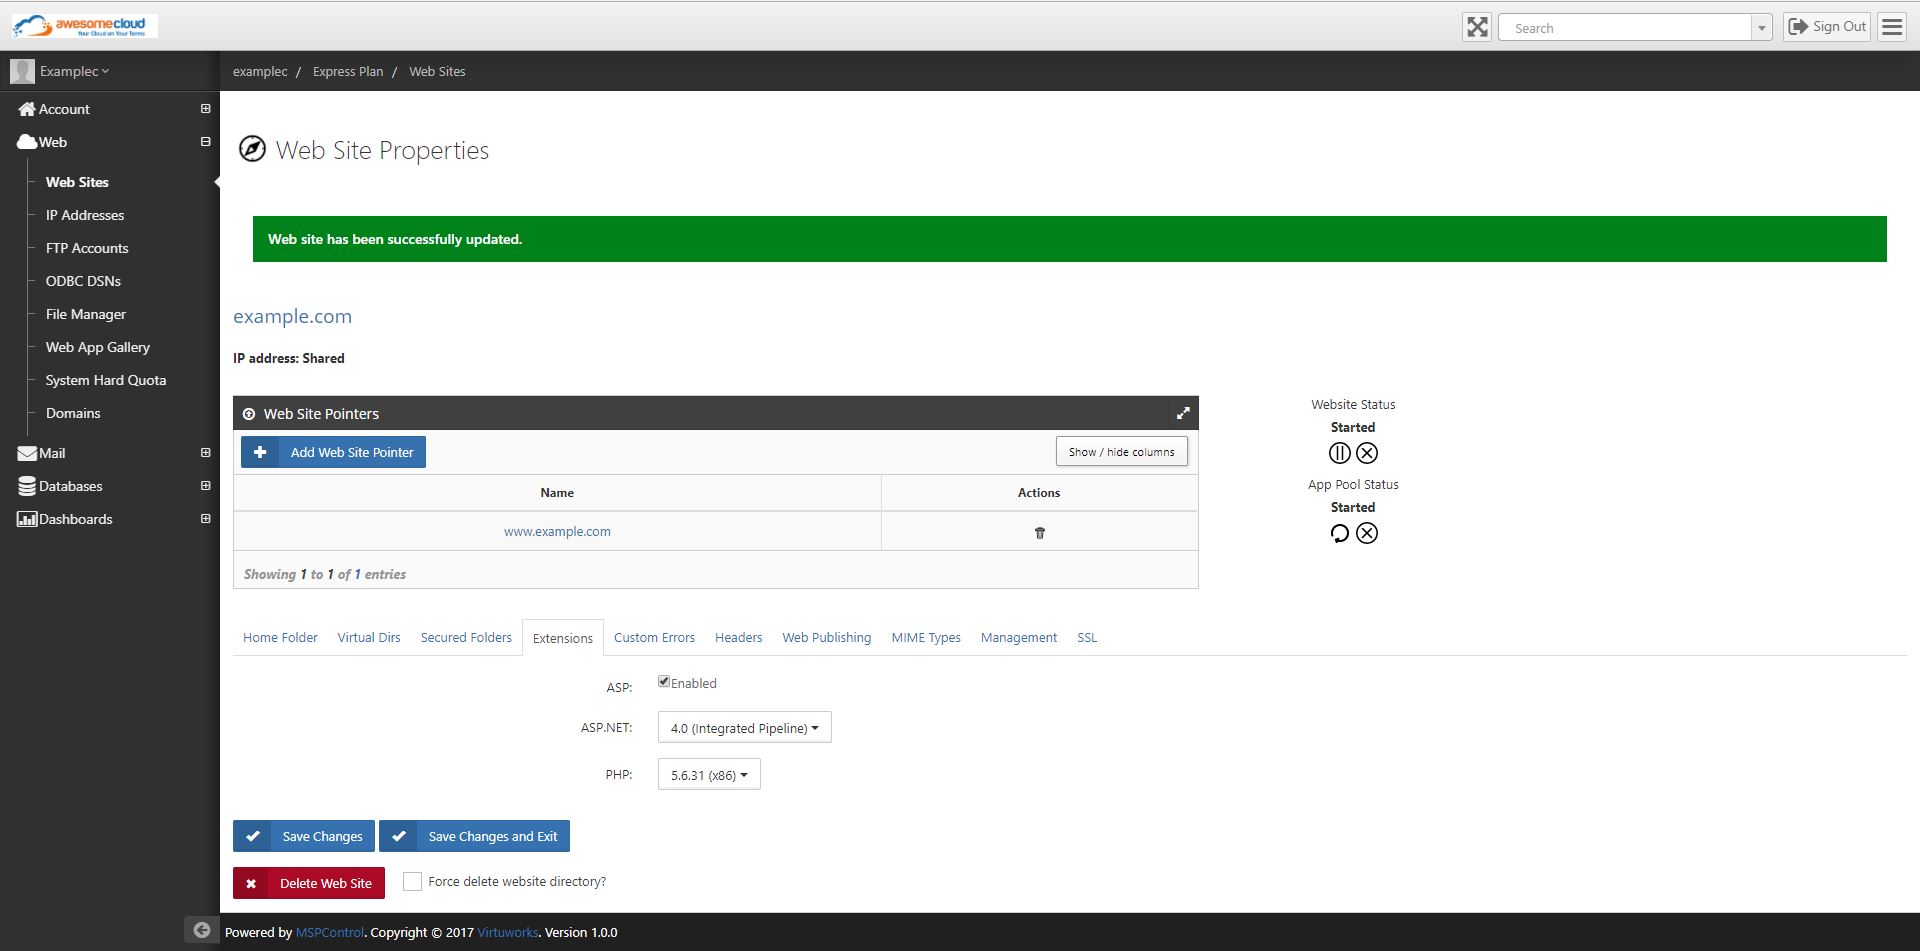
Step 6. You will know the new PHP version settings took effect when you see a confirmation at the top that the web site has been successfully updated.
Click on the screenshot below to enlarge it.
Content retrieved from: https://support.appliedi.net/kb/a1356/how-to-change-version-of-php.aspx.