Helm provides two ways to add your new customers. You can setup your customers manually from within Helm or customers can signup using the auto-signup script. Before adding customers, it™s necessary to setup your web hosting plans, as described earlier in this document.
Step 1: Entering Customer Information
To get started, click on the œUsers icon from the home page and then click on the œAdd New button. You will now be at the œAdd New User form.
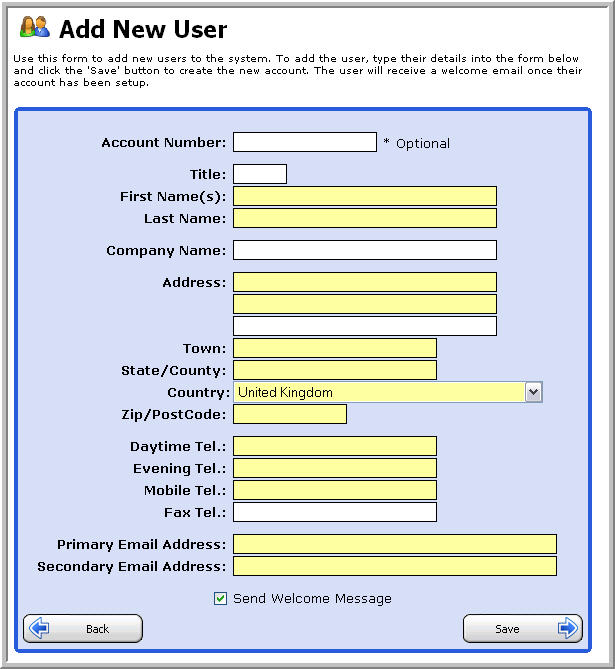
We recommend entering the username you would like to assign to the user in the œAccount Number field. If you leave the account number field blank, Helm will generate a random username and assign that to your customer. Entering a specific username into the account number field will ensure that your customer receives a username they can easily recall.
After completing the form, click on the œSave button to continue. Clicking on this button will cause two things to happen the user will be added to the system, and the user will also be emailed the welcome letter you created earlier. From this point, there™s a few different routes we can take, depending on how you would like to setup your customer™s account.
The first option is to simply let the customer receive the login information in their email. The customer will login to Helm and then be able to purchase a hosting plan and setup the domain name to their liking. The second option is to actually complete the process of selecting a plan and creating the domain name so that the customer doesn™t have to.
Step 2: Choosing a Plan and Adding the Domain
Please follow the procedure outlined below to choose a package for your user and setup their domain name.
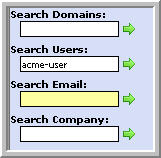
Step 1: Enter the user™s username in the œSearch Users box and click on the green arrow to perform the search. You will now effectively be seeing what your customer sees when they login.
Step 2: Click on the œPackages icon and then click the œAdd New button to subscribe your customer to a hosting package. In the package name field simply enter a friendly name that will help your customer identify the package from any other hosting packages they may have. Select the appropriate plan from the œWeb Hosting Plan drop down. Click the œSave button, which will take you back to the main œPackages page.
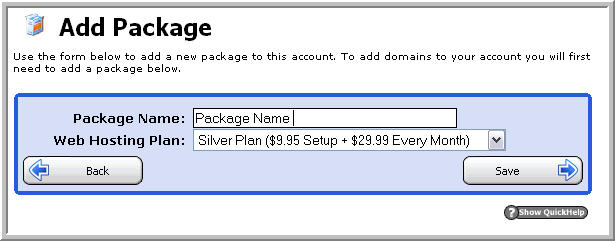
A) Enter Package Name
B) Click Save
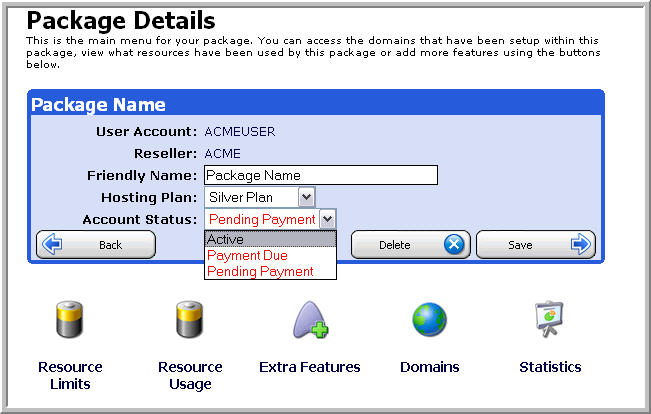
Step 3: Now click on the Package that you just created, change the account status to œActive and click Save.
A) Click Package
B) Change the account status to œActive
C) Click Save
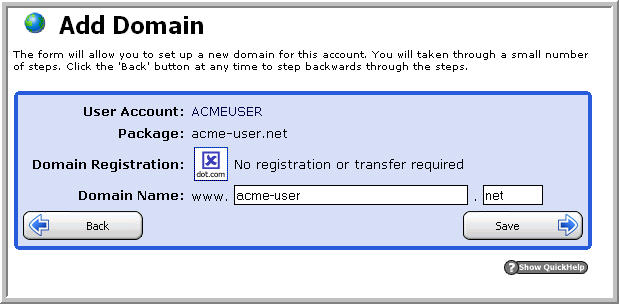
Step 4: Now click on the Domains icon and then click the œAdd New button.
Tip The main FTP username is the same as the domain name. For example, if the domain control panel password at the time of creating the domain. If the control panel password is immediately changed, the FTP account password will still be the old control panel password.
Tip If you setup FrontPage Extensions on a domain, the username to access their site via FrontPage is domain.com_fp. Using the same example as above, the username would be
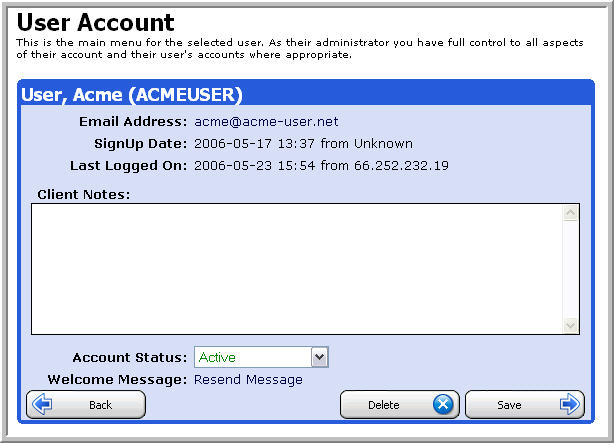
Resending a Welcome Message
Another useful feature is the ability to resend welcome messages to your customers at any time
(for example if you signed up customers before. To do this, simply choose the customer and in
their information bar at the top of the screen, simply click the Resend Message link to resend the
welcome message:
Content retrieved from: https://support.appliedi.net/kb/a1004/helm-resellers-how-do-i-add-new-customers.aspx.