This article will show you how to connect to your website files via FTP (file-transfer protocol).
General Steps: To connect to FTP, you will need 4 pieces of information:
- the FTP host,
- the FTP username,
- the FTP password, and
- the FTP port number.
(This will be either 21 or 990).
Once you have the above, enter them into your FTP program to connect to your website files.
For detailed steps, refer to the section below starting with Step 1.
FAQs (Frequently-Asked Questions)
What is this support article geared towards?
This article is specifically for sites in https://portal.awesomehosting.com, the new MSPControl Panel for AwesomeCloud shared hosting accounts. (If your website uses a different control panel, the settings on this page do not apply to you.)
How do I log-in to the MSPControl Panel?
For details on how to log-in to the control panel, visit https://support.appliedi.net/kb/a1348/how-to-login-to-portal_awesomehosting_com.aspx
I don’t have an FTP account. How do I create one?
For details on how to create an FTP account, visit https://support.appliedi.net/kb/how-to-create-an-ftp-user/?preview_id=1145&preview_nonce=1d3c1ccfec&preview=true
Detailed Steps:
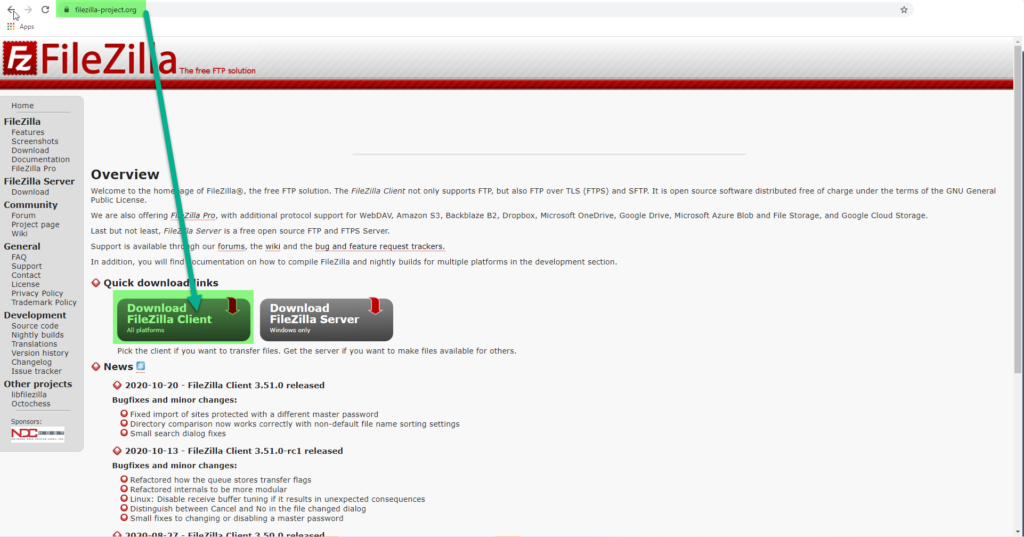
Step 1. First you will need an FTP program. We recommend FileZilla as it’s the most-commonly used FTP program and it’s free. If you already have FileZilla installed, you can skip to Step 17 below by clicking this link. If not, you can download it from https://filezilla-project.org/ if you don’t already have it installed. Click Download FileZilla Client on the left, as shown in the screenshot below.
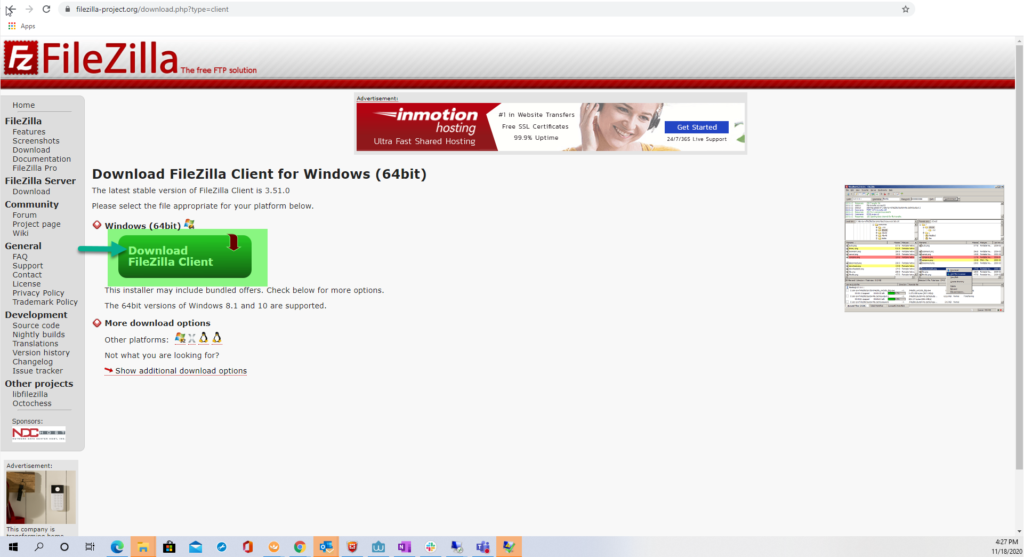
Step 2. Click Download FileZilla Client a 2nd time.
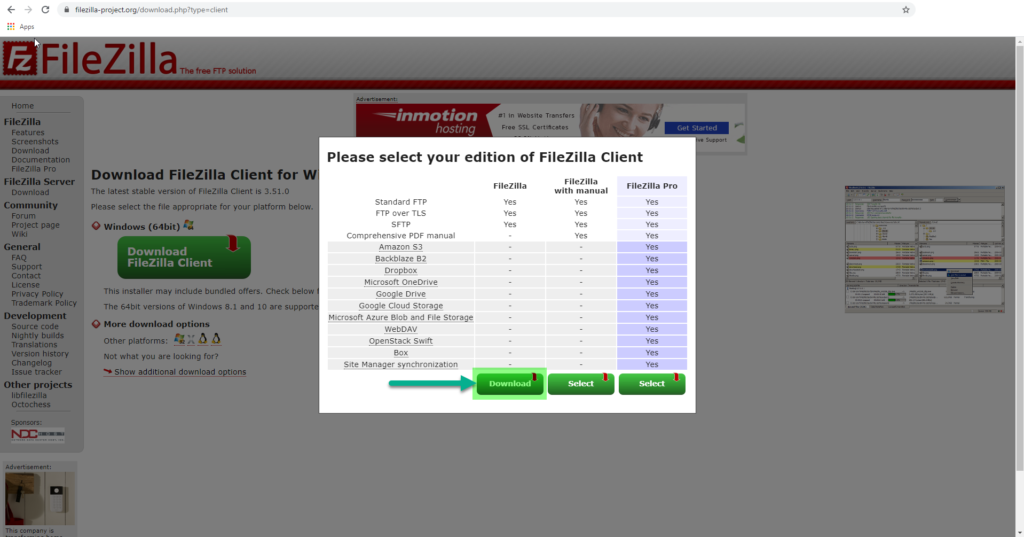
Step 3. Click Download.

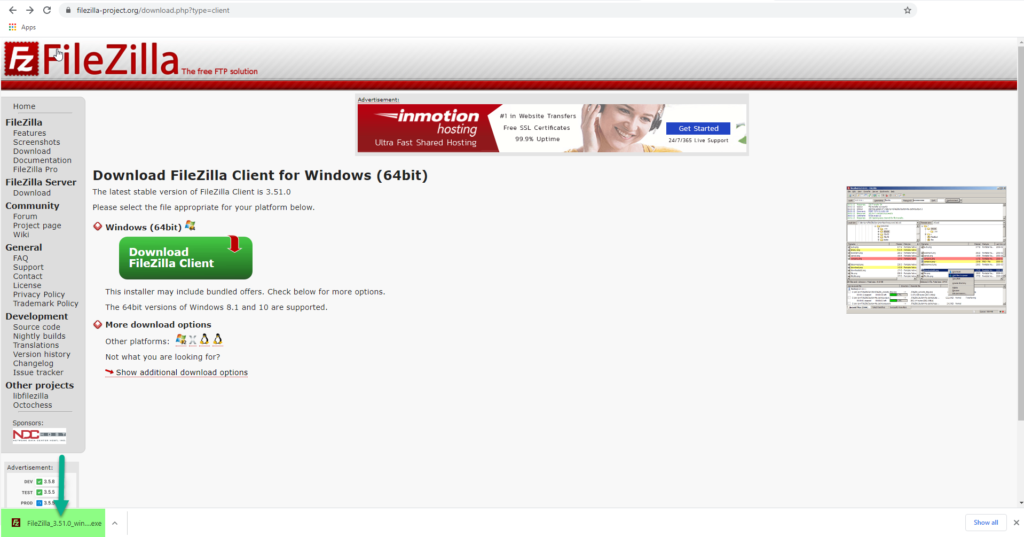
Step 4. You should see the download begin in your browser (In the example below, the download will appear in the lower, left-hand corner of the screen). Click it when it’s down downloading to start the installation of FileZilla.

The screenshot above is a zoom-in of the one below.
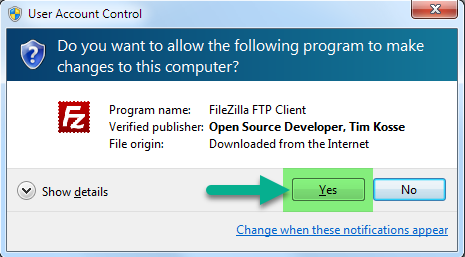
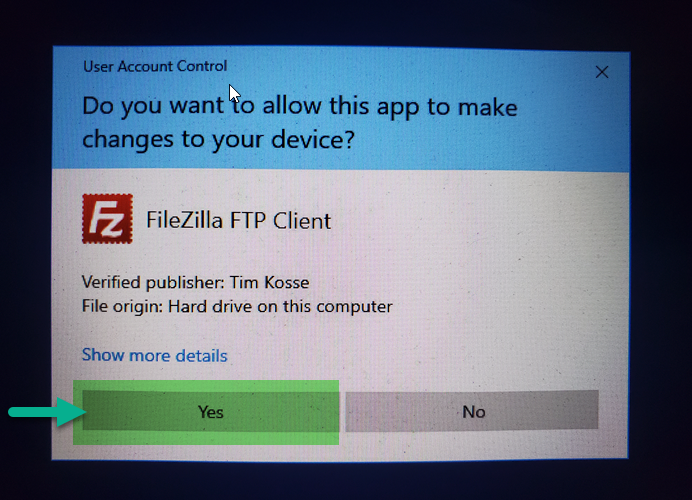
Step 6. If you’re using Windows 10, Windows 8.1, Windows 8, Windows 7, or Windows Vista, you will see a window pop-up for User Account Control (Windows UAC) asking if you want to allow the following program to make changes to your computer. Click Yes to continue.
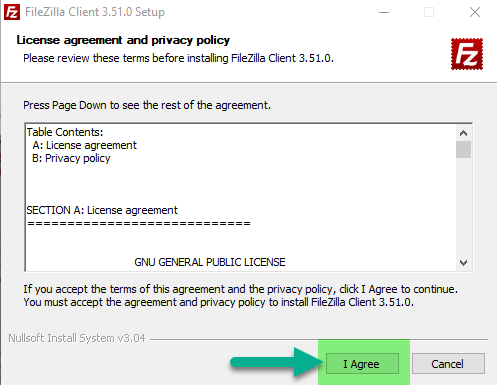
Step 7. To start the installation of FileZilla, click I Agree.
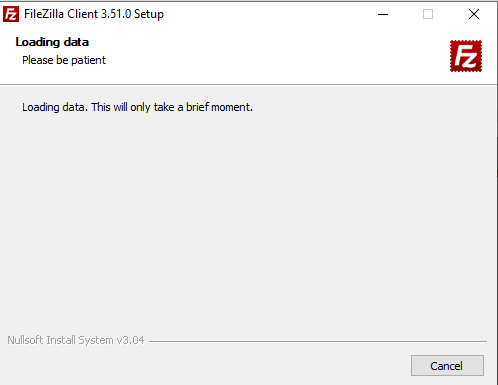
Step 8. The FileZilla installer will initiate and display the status below. This can take a few minutes and is normal. (Please be patient to avoid interrupting the installation mid-way. Do not click Cancel.)
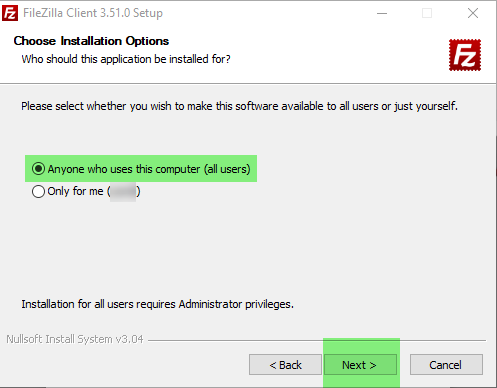
Step 9. Click the option to install FileZilla for Anyone who uses this computer (all users), then click Next.
This will help ensure that no matter which Windows profile you use to log-in to your desktop/laptop/machine, FileZilla will be accessible there.
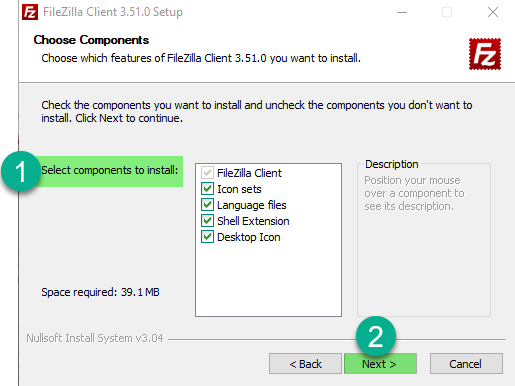
Step 10. Select the FileZilla components you want to install and click Next. (Notice: By default, the “Desktop Icon” is unchecked, so if you want a shortcut to the FileZilla program on your desktop, be sure to enable this checkmark before clicking Next.)
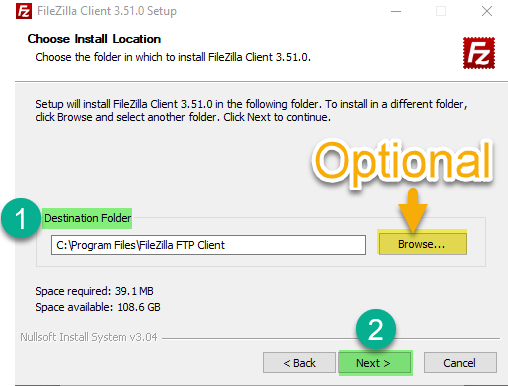
Step 11. Choose the Destination Folder location where you want FileZilla installed on your computer, then click Next.
(Notice: By default, FileZilla will install itself on the C:\ drive [the system drive] of your computer. If you want to install it on a different drive like a secondary data drive, or if you want to save space on the C:\ drive [the system drive], you can change the Destination Folder location where FileZilla will be installed by clicking Browse… and then navigating to the directory where you want it saved).
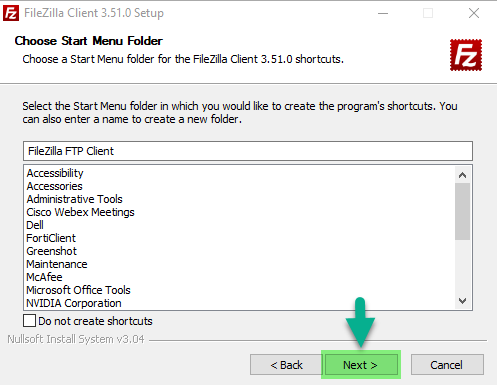
Step 12. Click Next.
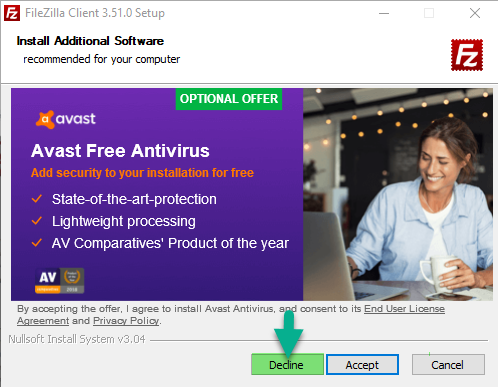
Step 13. You will see a screen prompt to Install Additional Software on your computer. Click Decline.
(These are third-party programs promoted by FileZilla and are not required for FileZilla itself to function, so we recommend clicking Decline to prevent the installation of potentially junk programs or problematic programs on your computer.)
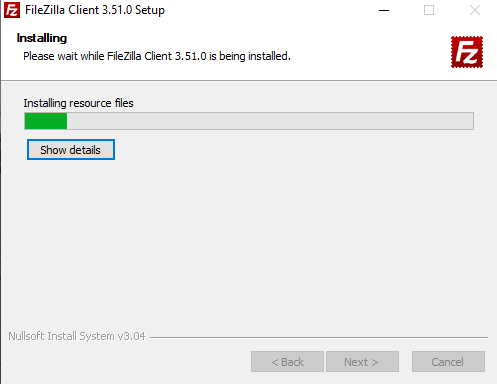
Step 14. The installer will run and you’ll see the green status bar fill-up as the installation progresses.
This can take a few minutes. (Please be patient to avoid interrupting the installation mid-way. Do not click Cancel.)
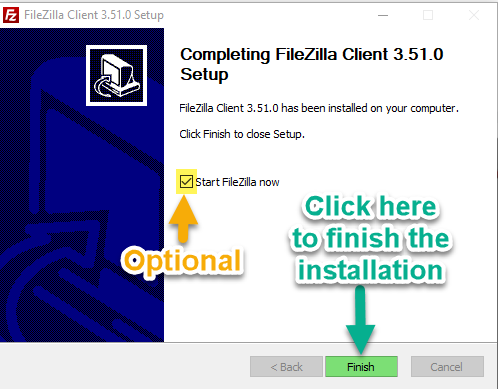
Step 15. Click Finish.
(Notice: By default, FileZilla will start automatically immediately after you click Finish. If you do not want to open FileZilla at this time or if you’d like to open it later, you can uncheck the box below).
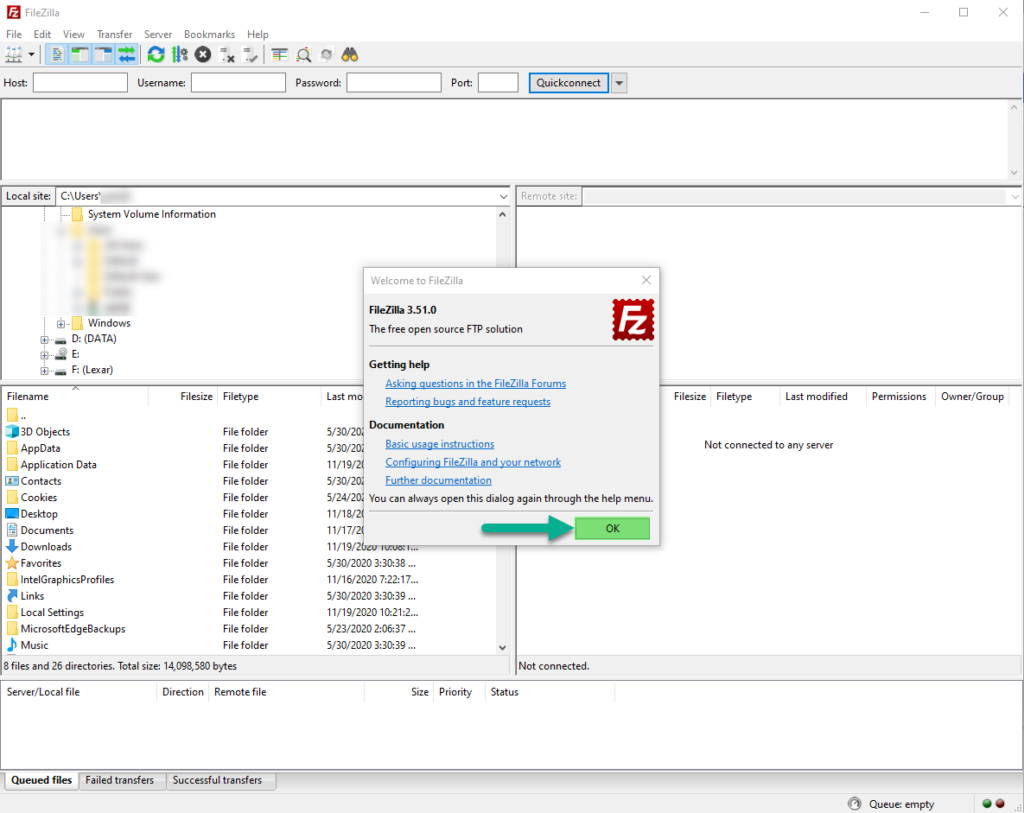
Step 16. You will see a Welcome message upon opening FileZilla. Click OK to close this dialog box.
Step 17. Now that you have the FileZilla program open, the next step is to enter the 4 required fields in order to connect to your website files. These are:
- the FTP host,
- the FTP username,
- the FTP password, and
- the FTP port number.
(This will be either 21 or 990).
If you know how to get these, you can proceed to Step 18 below. If you don’t know how to get these, you can continue on to Step 17A below.
Step 17A. The FTP host is the server where your website files are hosted. There are 3 ways to find your FTP host:
OPTION 17-A-1: The easiest way to find your FTP host IP address is by looking for the FTP IP address in the DNS settings of the MSPControl Panel.
First, log-in to the MSPControl at https://portal.awesomehosting.com
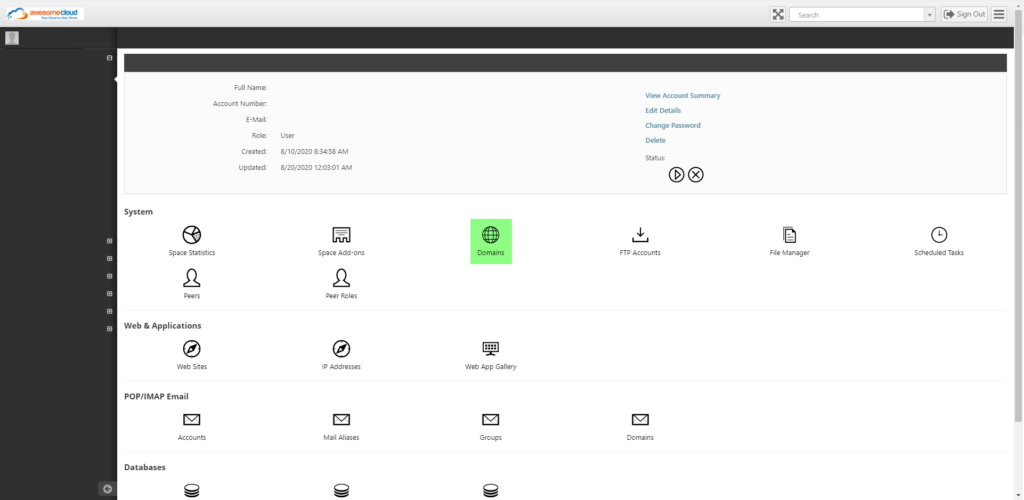
Once logged-in, click Domains.

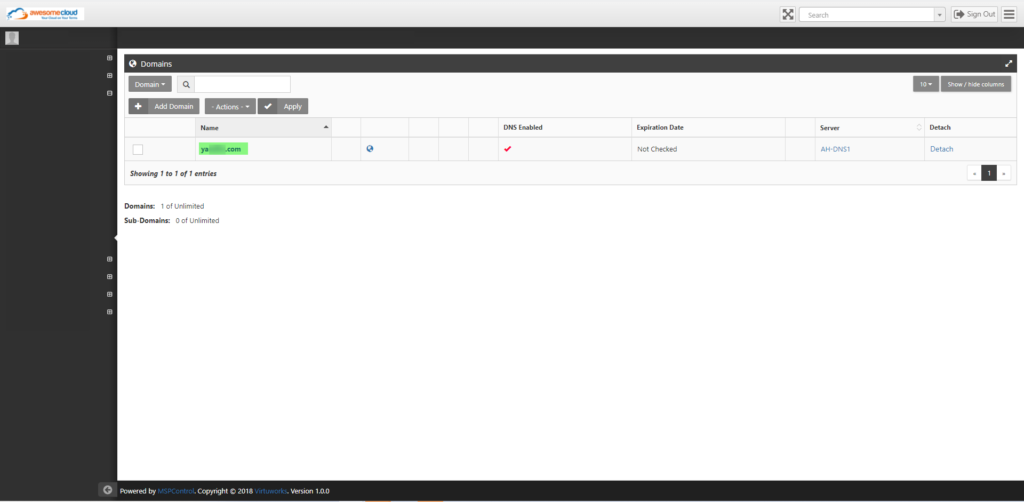
Click the name of the domain.

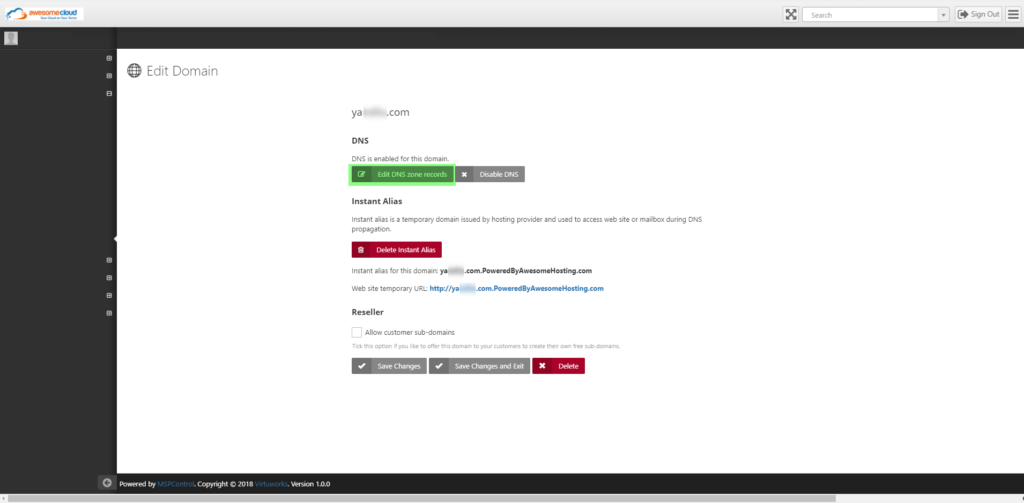
Click Edit DNS zone records.

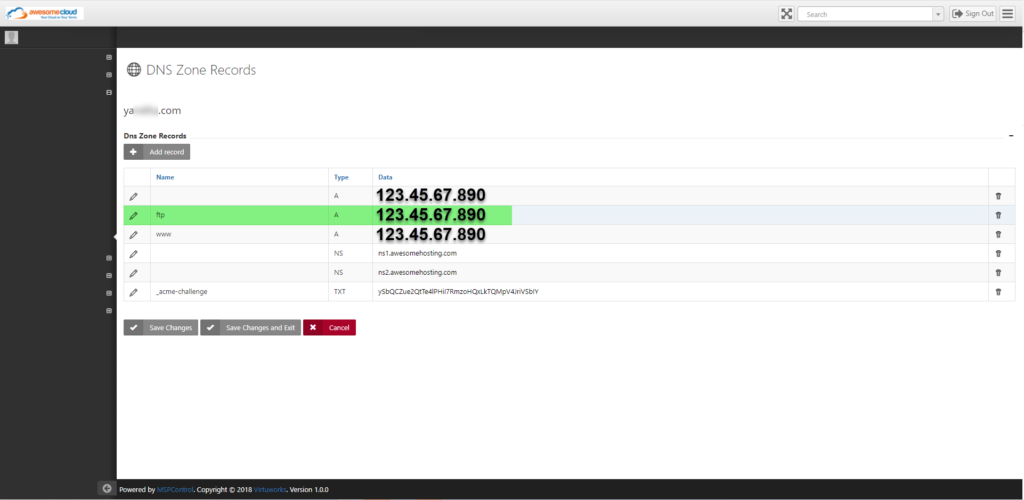
The hostname is the IP address listed to the right of the FTP record. This is the IP address you will need to use to be able to connect to FTP. An example is shown below:

OPTION 17-A-2: If you’re comfortable with Command Prompt [cmd], you can find your FTP host in most cases by pinging the site, as explained in the steps below. (Notice: This isn’t possible if your site is behind a web application firewall [WAF] and/or content delivery network [CDN] because the publicly-displayed IP when you ping the site will be the IP of the WAF / CDN — and not the server — so in those cases, you will need to either use Option 17A-2 below, or get the IP address that’s in the WAF).
Open Command Prompt in administrative mode.
For Windows 10 machines, click Search next to the Start and Cortana buttons.

Search for the keyword cmd and right-click the Command Prompt program, then click Run as administrator.

Ping the site running the following command:
ping yourdomain.com

OPTION 17-A-3: Another way you can find your FTP host is by logging-in to the Applied Innovations Billing Portal at https://billing.appliedi.net. Once signed-in, look under the list of Your Active Products/Services as shown below.

If your plan name is AH-WEB01, then your FTP hostname is 52.170.40.54
If your plan name is AH-WEB02, then your FTP hostname is 52.226.18.39
If your plan name is AH-LEGACYWEB01, then your FTP hostname is 40.76.94.61
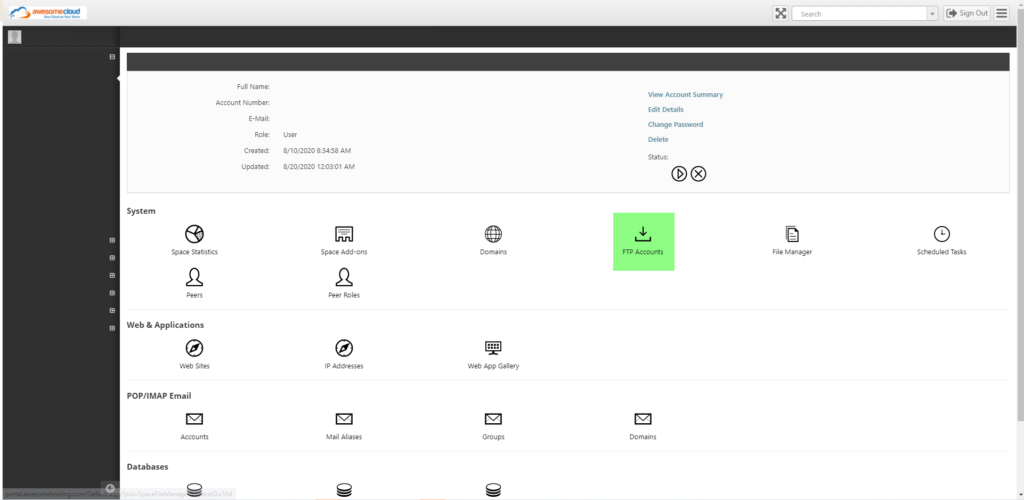
Step 17B. The FTP username is the name of the FTP account you’re using. To find your FTP username, log-in to the MSPControl Panel at https://portal.awesomehosting.com and click FTP Accounts. Details are shown below:
First, log-in to the MSPControl at https://portal.awesomehosting.com
Once logged-in, click FTP Accounts.

Step 18. Now that you have the FileZilla program open, the next step is to enter the 4 required fields in order to connect to your website files. These are:
If you encounter any errors or difficulties along the way, feel free to contact Support at https://support.appliedi.net
Content retrieved from: https://support.appliedi.net/kb/a1349/how-to-create-an-ftp-user.aspx.
