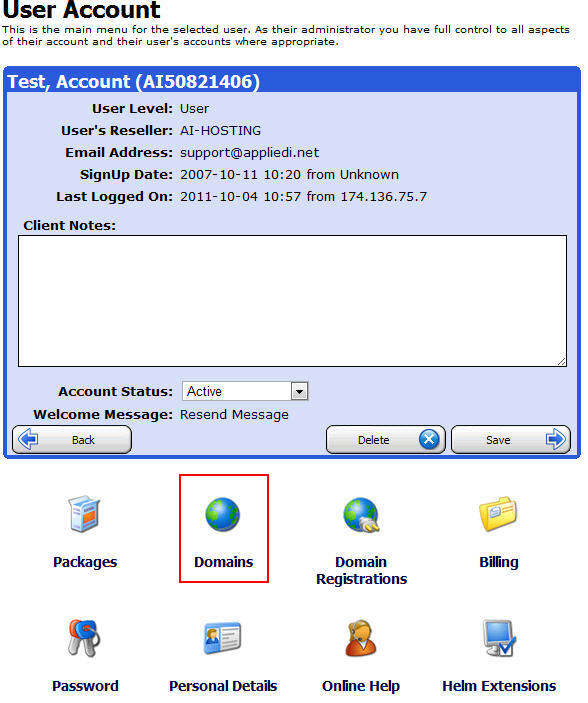
Log into your control panel at https://control.appliedi.net/
Select the "Domains" button
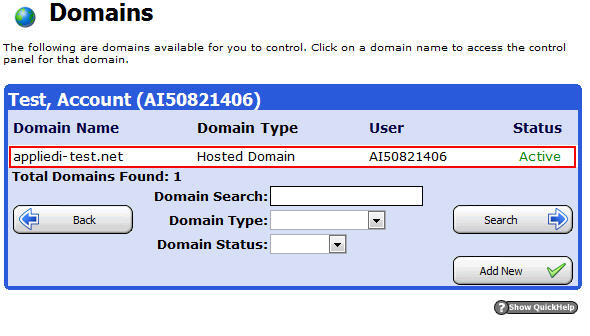
Select the domain:
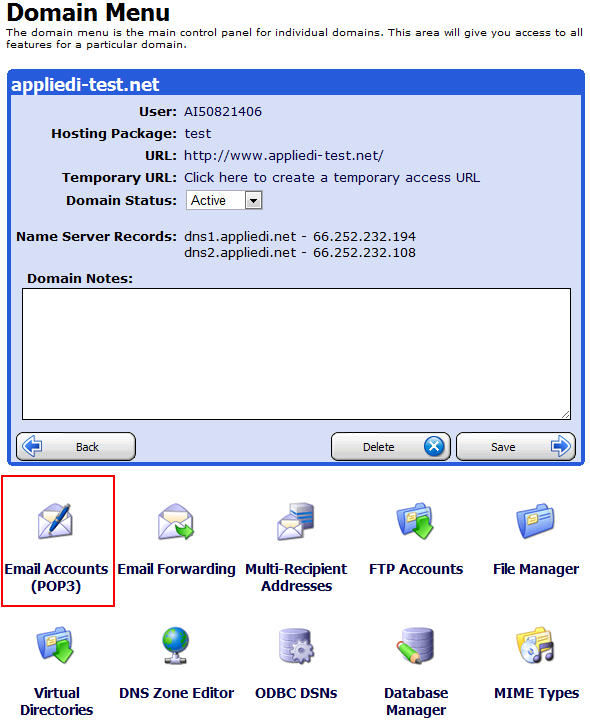
Click on "Email Accounts (POP3)"
In the next section, click on the "Add New" button.
The next screen is where we enter the information for the email account.
Making a POP3 E-mail account in your Control Panel.
You can set up POP3 accounts to collect mail for your domain. By default, when a domain is created a œmail.domain.com POP3 account is created. You can add/delete/alter this and other POP3 accounts for your domain. Choose œEmail Accounts (POP3) from the Domain Menu. Click Add New to create a new POP3 account:

1.) Enter the email address you want people to mail this account at, and a password. The password will be used in programs such as Outlook to pull the mail from that domain.
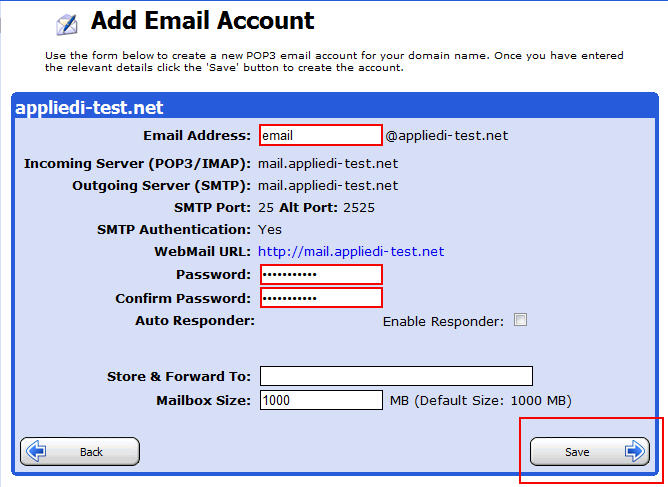
2.) You can set up an Auto-responder for the POP3 account as well. In the auto responder text box enter the message you would like to be sent to the sender of emails you receive.
3.) You can Store and Forward emails sent to this POP3 account. You can specify an email address where email sent to this account will get forwarded to, after it has been stored in the POP mailbox. This is much like a standard email forwarding account; except the email is first stored in the POP mailbox and you have several other options such as a vacation message being sent before the email is forwarded to another location.
4.) Click Save to complete the creation of the email account. The number of POP3 accounts you have will be dependent on your web hosting account. To delete a POP3 account, open it and click Delete, then OK to confirm.
Content retrieved from: https://support.appliedi.net/kb/a1005/how-do-i-set-up-email-accounts-pop3.aspx.