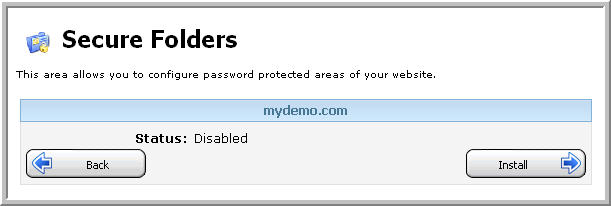
You now need to set up a user account that will be able to access password protected folders that you set up on this domain. Click the œUsers button.
Choose œAdd New. You now need to choose a username and password that you will enter in future when you get prompted to access your protected folders.
NOTE:- You cannot have a space in the User name. This is due to the way that Windows user accounts work. In the above example, œUser1 John would not work, but œUser1-John or œUser1_John is fine.
Click œSave to save this user. You can add as many users as you like. When done, go back to the main screen.
You can add Groups of users as well as single users. To do this, click the œGroups button, then click œAdd New to add a new user Group.
Choose a Group Name and click œSave.
NOTE:- You cannot have a space in the Group name. This is due to the way that Windows group accounts work. In the above example œSample Group would not work, but œSample_Group is fine.
Now click that group to get taken to the update screen.
You will see that there are no users added to the group yet. Click œAdd New to add a user to the group.
You can now select a user to add to the group from the list of available users in the dropdown box. Choose one, and click œSave. Repeat the process for however many users you wish to add to the group.
Once you have added users to a group, removing them is simple. Click the user you want to remove, and click œDelete. To delete the group and all users associated with it, choose the group and click œDelete.
Now you have your users and groups set up, select œFolders from the Secure Folders menu.
Click œAdd New to add a new directory that you wish to password protect.
You will be prompted to add the path from the wwwroot folder to the folder that you wish to protect. If you know the path, you can type it manually. Alternatively, using the folder search tool (highlighted) will open a small window and let you select the folder by clicking it.
In the above instance, the folder œSecureMe was chosen to be secured. Click œSave to save the protection on this folder. Now you need to select the users/groups that you wish to have access to this folder. Click the created folder.
To add a group, choose œAdd New under the Allowed Groups section. You will see the groups available to add to this folder.
Click œSave to add this group to the folder. Now, all users in this group will have access to the secured folder (in this case User1 and User2).
To add individual users, click œAdd New under the Allowed Users section. As with groups, you can select available users to add to the folder.
To remove all protection and user rights granted to a particular folder, simply choose that folder to get taken to the above Update Secure Folder screen, and click œDelete.
Content retrieved from: https://support.appliedi.net/kb/a40/how-do-i-create-secure-password-protected-folders.aspx.
