This article will show you how to create a website in https://portal.awesomehosting.com, the new MSPControl Panel for AwesomeCloud shared hosting accounts.
For details on how to log-in to the control panel, visit https://support.appliedi.net/kb/a1348/how-to-login-to-portal_awesomehosting_com.aspx
Step 1. Once logged-in to MSPControl Panel, you’ll see the main page below. This is your hosting space. Click Web Sites.
Step 2. Click + Add.
To create the site:
Step 3. Select the domain of the web site. If you do not see the domain listed, create the domain by following the steps in https://support.appliedi.net/kb/a1350/how-to-add-a-domain.aspx
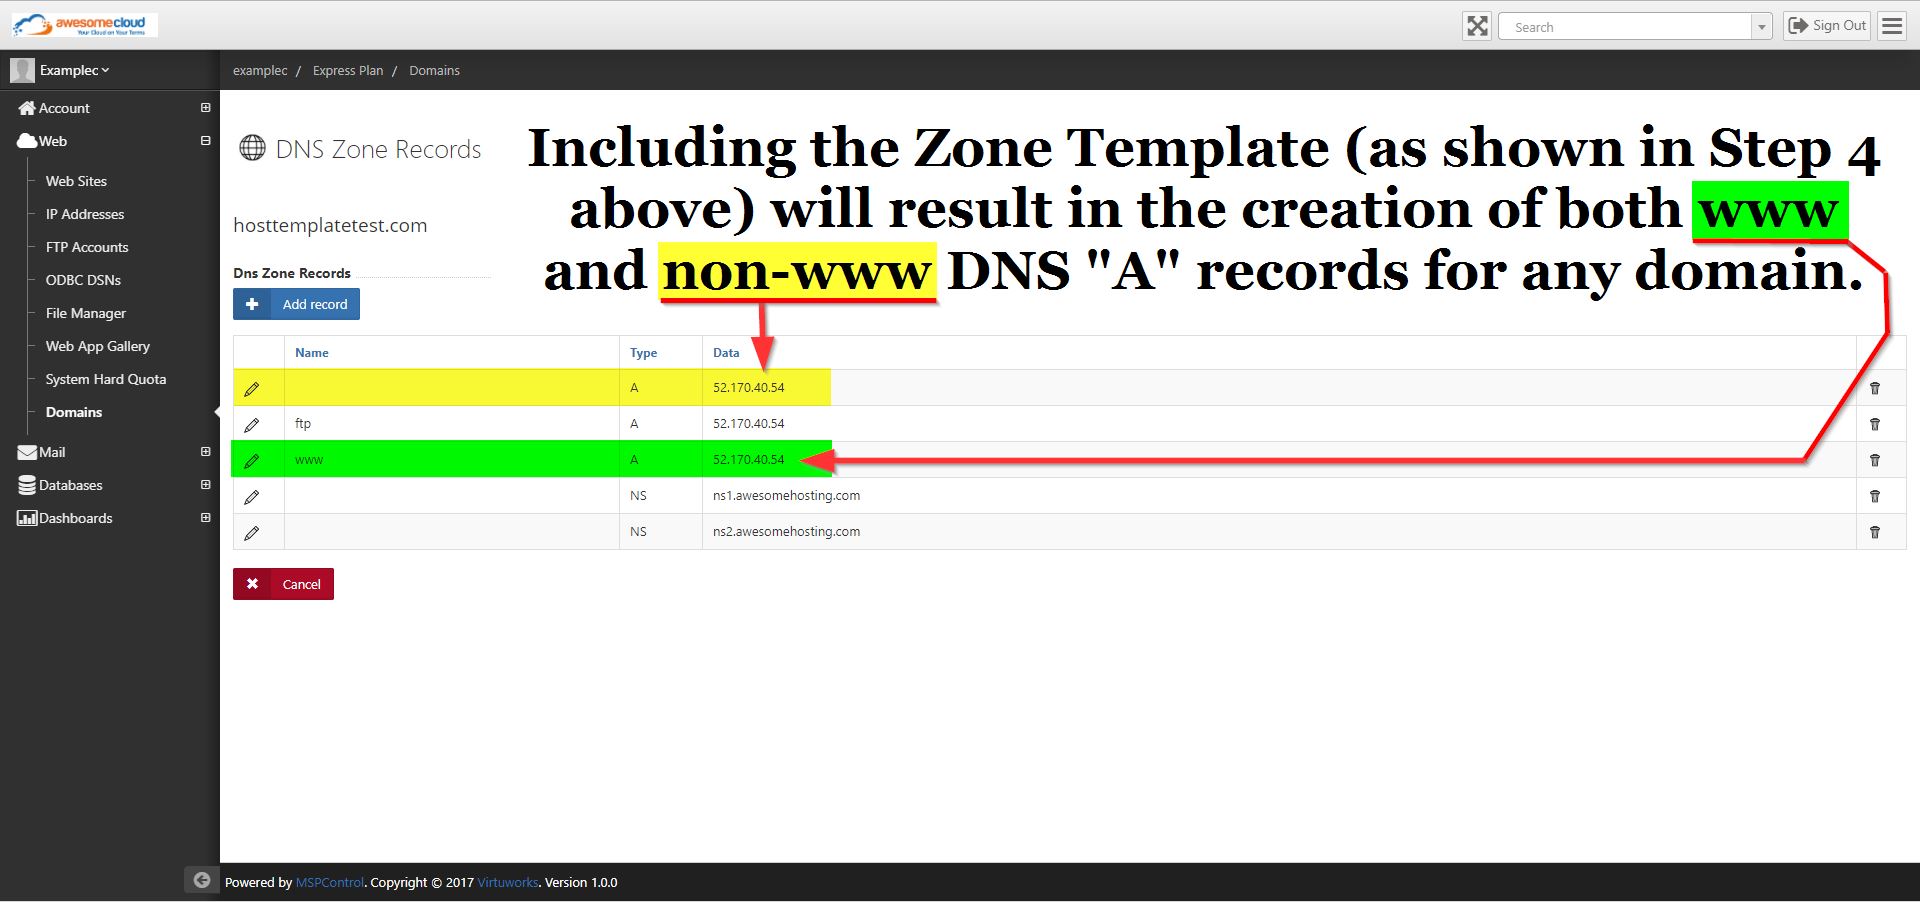
Step 4. Check the box to Include Zone Template.
Optional Step 5. If you want to create a subdomain of the site (for example, test.enterthenameofyourdomain.com) you would enter the subdomain where it says Site:
Step 6. Click + Create Web Site.
Below is an example of what you will see if the zone template is included (recommended):
Click on the screenshot below to enlarge it.
Below is an example of what you will see if the zone template is not included . (Leaving the box unchecked is not recommended):
Click on the screenshot below to enlarge it.

Step 7. You will see the following status as the website is being created.
Step 8. Scroll down to the bottom and click Save Changes.
Step 13. Scroll down to the bottom and click Save Changes.
Content retrieved from: https://support.appliedi.net/kb/a1351/how-to-create-a-website.aspx.