How Do I Customize My Welcome Letter?

Upon adding new user accounts to Helm, the control panel is capable of emailing your new customer a customized welcome letter with their account information. Click on the User Settings button and then the Welcome Message button to set up the customized welcome letter.
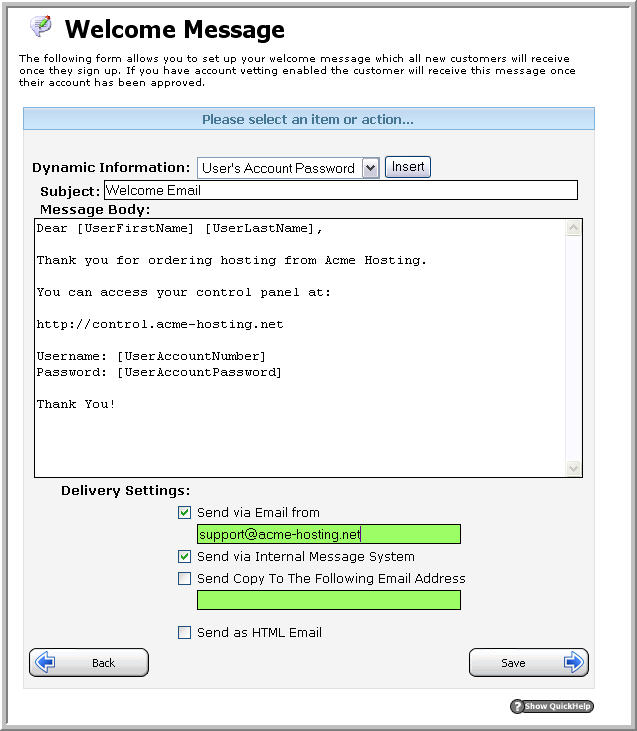
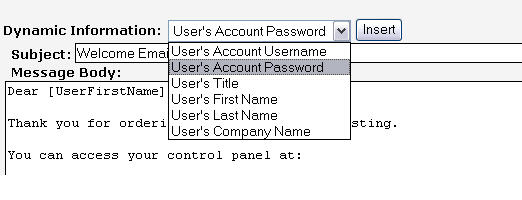
Using the dropdown menu entitled "Dynamic Information", you can insert dynamically generated content into your welcome letter. This feature is especially helpful for making your welcome letter seem personalized and thoughtful.
Subject: The email your user receives will contain this subject.
Message Body: This is the content of the email that your user will receive.
Send via Email From: The email your customers receive will be sent from this address. For example, it would be a good idea to enter your support or sales email address in this field.
Send via Internal Message System: Checking this box will also send the user a copy of the email message via the Internal Message system.
Send Copy To the Following Email Address: Checking this box and entering a valid email will "carbon copy" the email address you enter with all welcome emails automatically sent out by
Enabling this feature is helpful as it lets you have a record of the information that gets sent to your customers.
After making all of your changes, click the Save button to save your changes. This will take you back to the User Settings main page. To continue customizing your account, go back to the Account Settings area by going to the Home page and then click the Account Settings button.

Tip Make good use of the Dynamic Information – be sure to include your customer’s username and password!
Content retrieved from: https://support.appliedi.net/kb/a996/how-do-i-customize-my-welcome-letter.aspx.
