This tutorial will show you how to configure a web site in IIS on your dedicated server or VPS server.
This tutorial assumes you are not using a control panel system such as Helm or Plesk (if you are you should create the web site through your control panel directly)
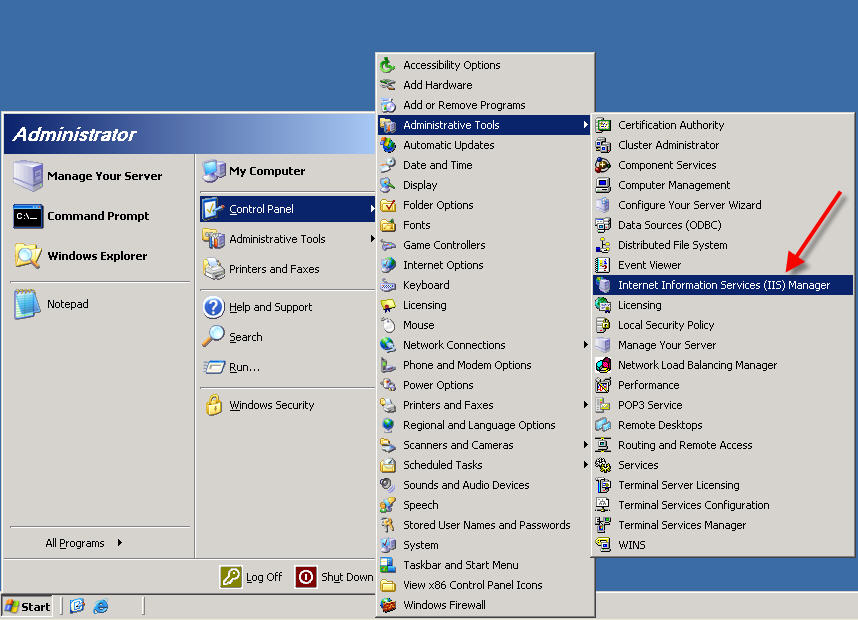
Open a Remote Desktop connection to your server, and open the Internet Information Services (IIS) MMC.
This is found under the control panel -> administrative tools
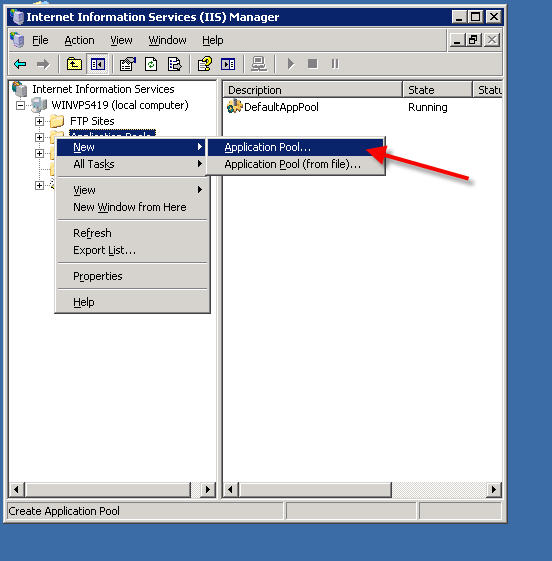
First, you will create an Application Pool for the new web site. An Application Pool separates each web site from other sites in it’s own process, which keeps one site from crashing all other web sites on the server.
Right-click on Application Pools and select New –> Application Pool…
Enter the domain name of the web site you are adding to your server (you can name this anything you like, but we recommend using the domain name for organization purposes)
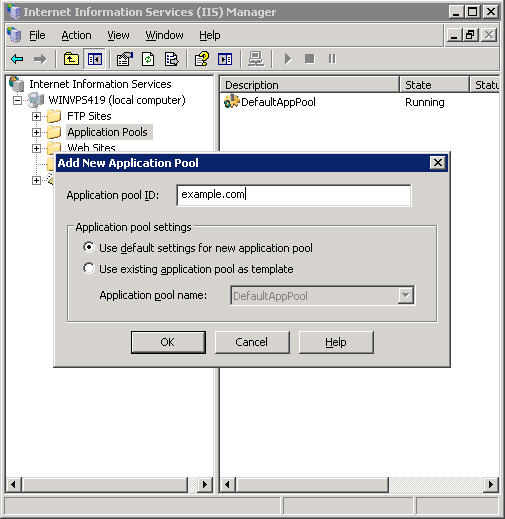
Press OK to complete the Application Pool setup.
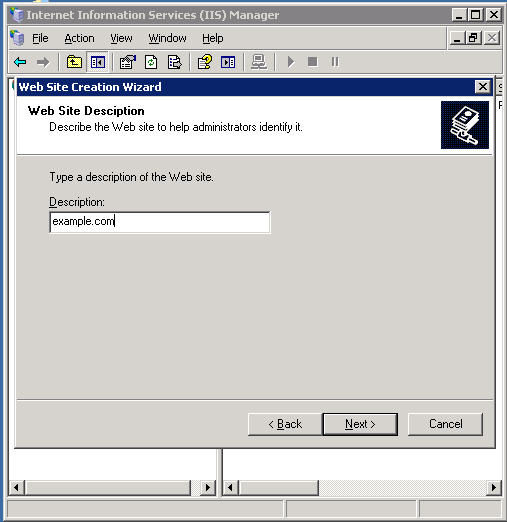
Now we will create the web site. Right click on the ‘Web Sites’ folder and select New–>Web Site…

We recommend you enter the domain name as the Description so you can easily manage your domains on your server. Enter the domain name you are setting up and press OK.
On the next screen, you will need to assign the new web site with an IP address and give it a host header value. By using host headers you can run multiple domain names off one IP address. So unless a web site requires it’s own IP address (for use with SSL for example) we recommend you use the same IP address for all sites.
The IP address below is just an example, you will need to enter one of the IP addresses that was assigned to your server.
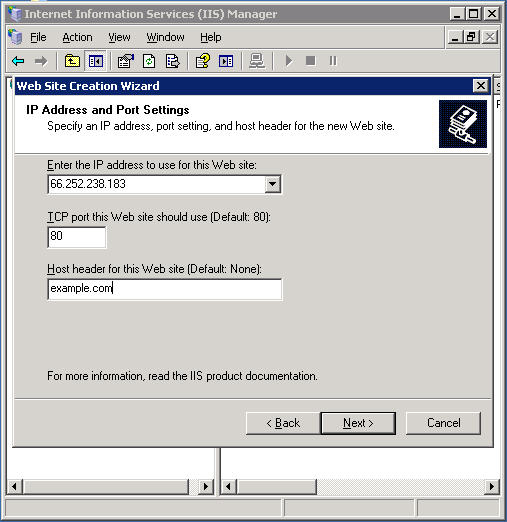
Press next.
On this next screen is where we define the folder where your domain name will point to.
We recommend that you first create a folder under your C: drive named ‘domains’ , and place your domain folders there. You can create both folders in this screen, of if you already created the domains folder, then you only need to create the folder for the new web site.
We recommend you name your folders the same as the domain name, so in this case we are creating a new folder under c:domains called ‘example.com’.
Inside the domain’s folder, you should create a folder named ‘wwwroot’ for the web site to reside in.
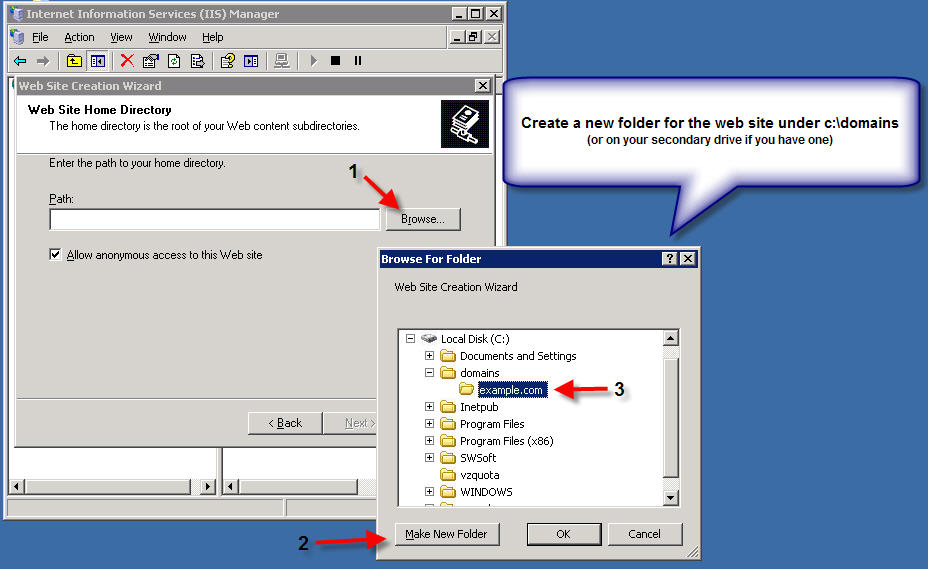
Be sure to also create the ‘wwwroot’ folder after you create the folder for the domain name.
You should have the full path to your web site folder in the ‘path’ field as in this example:
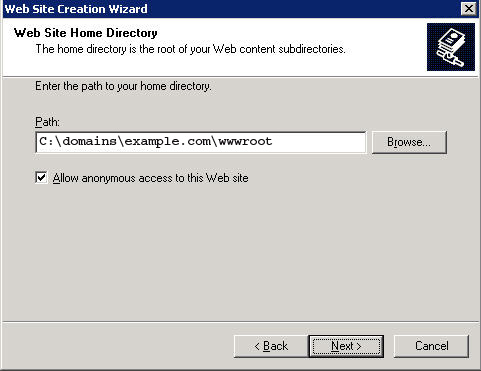
Press Next.
Make sure both ‘Read’ and ‘Run Scripts’ are checked on:
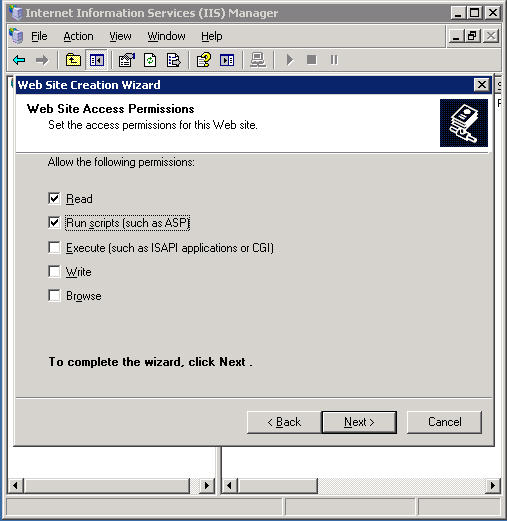
Press Next.

Press Finish.
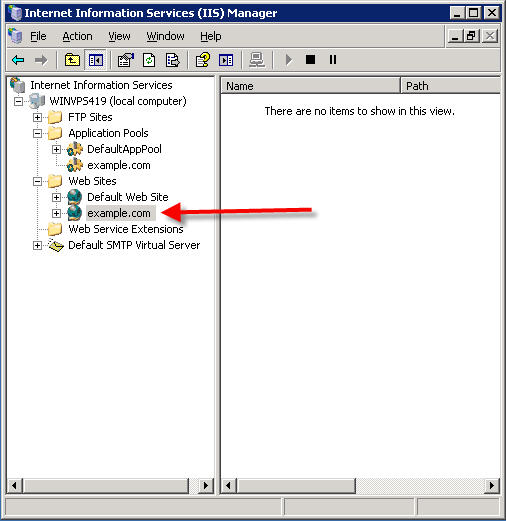
You will now see your new web site listed under ‘Web Sites’ in IIS:
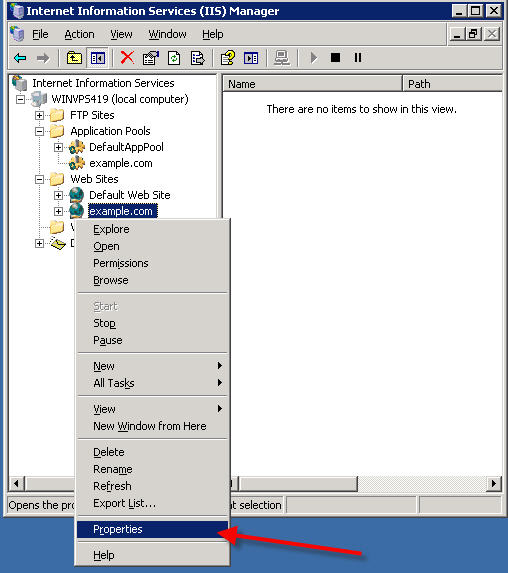
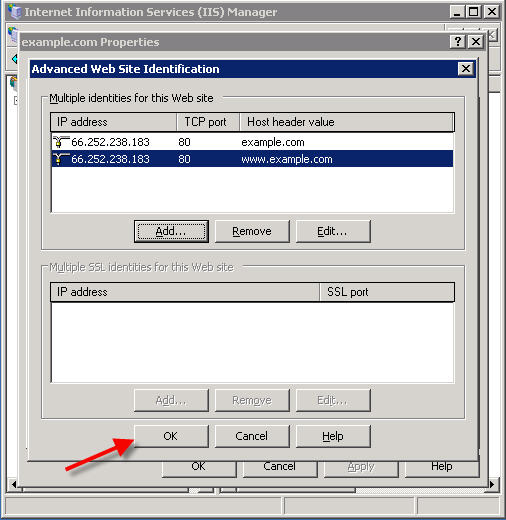
Now we need to add the other host header for your domain.
Right-click on the new web site you created, and select ‘Properties’
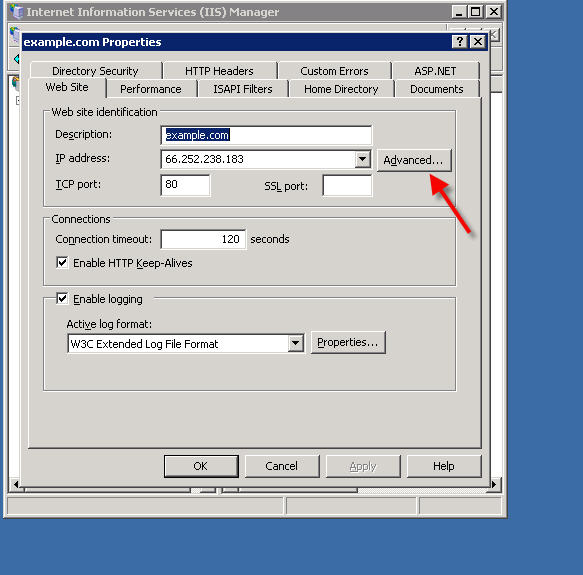
You should automatically be on the ‘Web Site’ tab of the Properties. Click the ‘Advanced’ button:
Click the ‘Add’ button:

In the drop-down IP Address menu, select the same IP address that you assigned to the web site earlier.
Set the TCP Port to 80
and in the ‘Host Header value’ box, enter the domain with the ‘www’ in front:
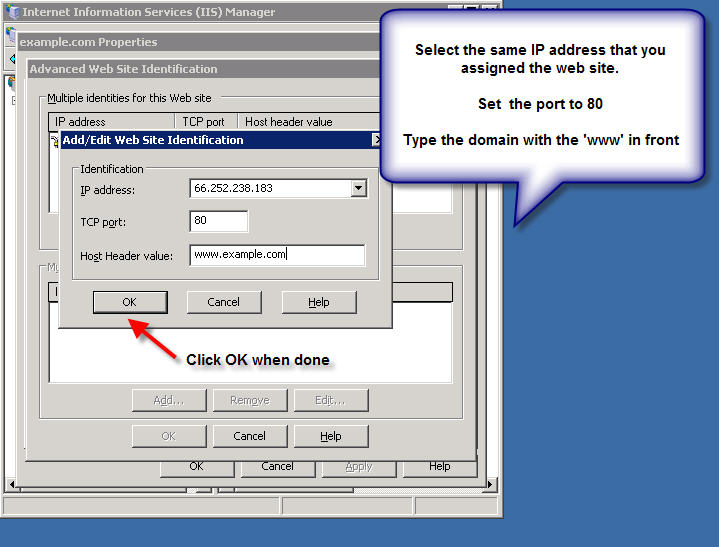
Press OK, and then press OK again:
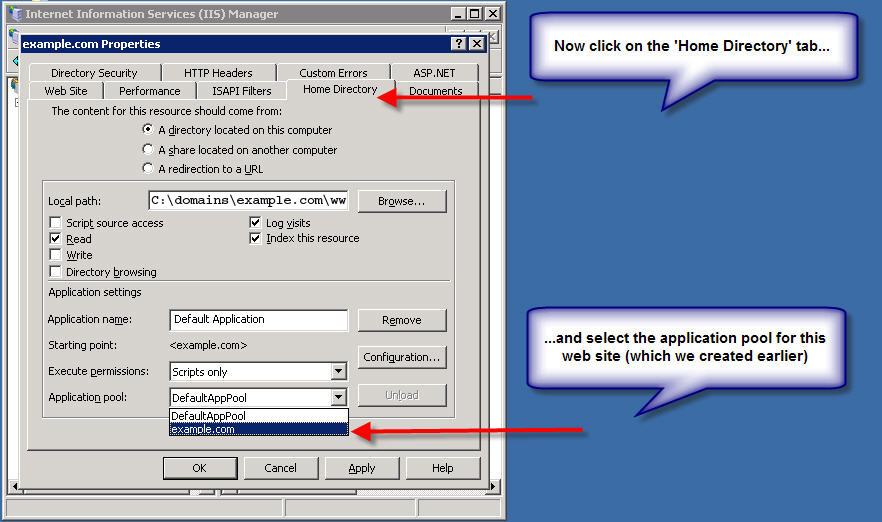
Now, click on the ‘Home Directory’ tab at the top, and select t he application pool for this web site (which you created in the first steps)
Your new web site is now configured on your server!
Content retrieved from: https://support.appliedi.net/kb/a102/how-to-manually-create-a-web-site-in-windows-2003-dedicated-vps-servers.aspx.