Often you’re required to set a directory as an application in IIS. In the past this process was done by hand by the system administration but with our control panel you’re able to do this yourself easily with a few simple steps. When is this needed? Generally when you want to run a ASP.net application in a subfolder and have it’s web.config in the subfolder and have the application operate independant of the root web.
Solution
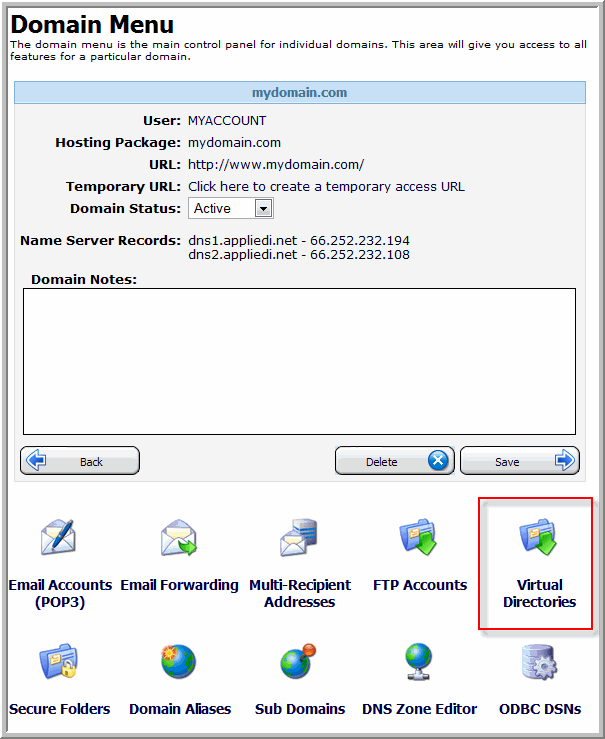
First log into your control panel at http://control.appliedi.net and go to the domain menu of the site you’ll be setting the application settings for. From the domain menu you’ll select the option “Virtual Directories” as shown in the image below:
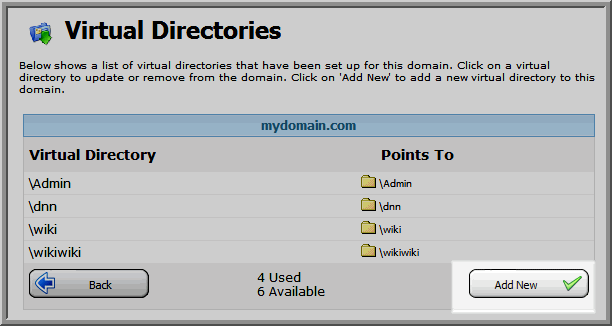
After you select Virtual Directories you’ll be presented with the Virtual Directories Menu. You may or may not have virtual directories already created so your image may differ slightly from the below image. From the “Virtual Directories” menu select the “Add New” button as highlighted below:
This will bring up the “Add Virtual Directory” menu.
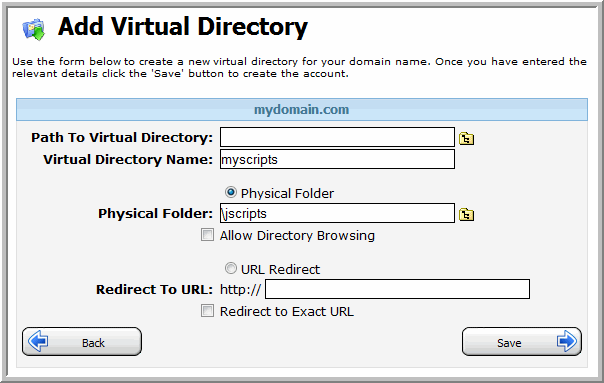
In the box labeled “Virtual Directory Name” put the name you’ll want your virtual directory to use, this name should be the same as the physical folder name.
Check the box Physical Folder and click on the folder icon to browse for the folder you’ll be setting as an application. Once selected the Physical Folder field should have the directory name.
Finally click the save button to complete adding the Virtual Directory. Your folder should now be set as an Application and ready for use.
Content retrieved from: https://support.appliedi.net/kb/a369/how-do-i-create-a-virtual-directory-or-set-a-folder-as-an-application.aspx.