Configuring Site Alias Settings
How to choose the site alias mapping mode and set the default alias for a site. Note: This setting is only effective in single site configuration only. Restricted to SuperUsers.
- Navigate to Host >
 Site Management and then click on the Edit
  button beside the title of the required site to open the Edit Sites page – OR – Navigate to Admin >
  Site Settings.
 - Go to Advanced Settings > Site Aliases.
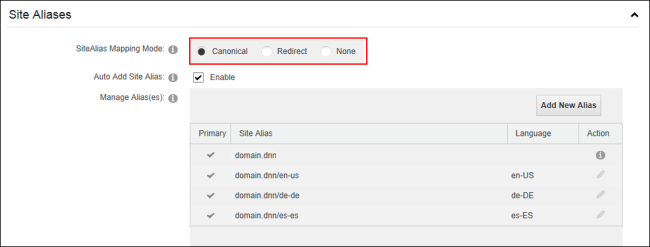
- At Site Alias Mapping Mode, this mode is used to determine how to handle web sites that have multiple domains pointed at one IIS website. DNN will automatically add that site alias to its list. Select from these options:
- Canonical: The new URL is automatically mapped but is handled as a Canonical URL. This adds a link element to the element of the page so that when an alias that is not the default is used to browse to the site it tells search engines to compile all the results into one alias (the canonical or default alias).
- Redirect: The URL is automatically mapped but is redirected to the default alias and a permanent redirect (301) is sent to search engines.
- None: Select if the new URL is not mapped. This setting will disable the automatic creation of Site Aliases. This is the default setting on upgrades.
- The default alias is used in conjunction with the Site Alias Mapping Mode field. When the mode is set to Canonical then the default alias is used as the canonical alias for search engines; however when the mode is set to Redirect then the default alias is used as the permanent redirect. The Primary alias should be chosen if either Canonical or Redirect modes have been selected above. To change the primary alias:
- Click on the Edit
 button beside the alias to be set as primary.
 - Optional. Select the Primary radio button.
- Click on the Edit

- Click the Update button.
Content retrieved from: https://support.appliedi.net/kb/a1234/configuring-site-alias-settings-in-dnn.aspx.
